
In our previous article, we introduced how to deploy a simple website project using GitHub Pages. As a leading free static website hosting platform, Netlify offers a simpler and faster deployment experience. In this article, we’ll walk you through the entire process. Deploying a Static Website with Netlify End-to-end.
Deploying a static website consisting solely of HTML, CSS, and JS on Netlify is very simple,Permanently free, built-in CDN, automatic HTTPS, I’ve put together two of the most practical methods for you: drag-and-drop uploads with Xiaobai and automatic Git deployment—taking you from zero to live in one go.
Step 1: Preparations Before Deployment
1. Sign up for a Netlify account
Go to the Netlify website:https://www.netlify.com
Click the top-right corner Sign Up,We recommend using your GitHub account for one-click registration.(You can skip the authorization step for subsequent Git deployments), or you can register with your email address.
After logging in, you'll be taken directly to the project management dashboard.
2. Prepare the static website files
You'll need to set up a folder for your website project,The root directory must contain the index.html homepage file., otherwise a 404 error will occur after deployment.
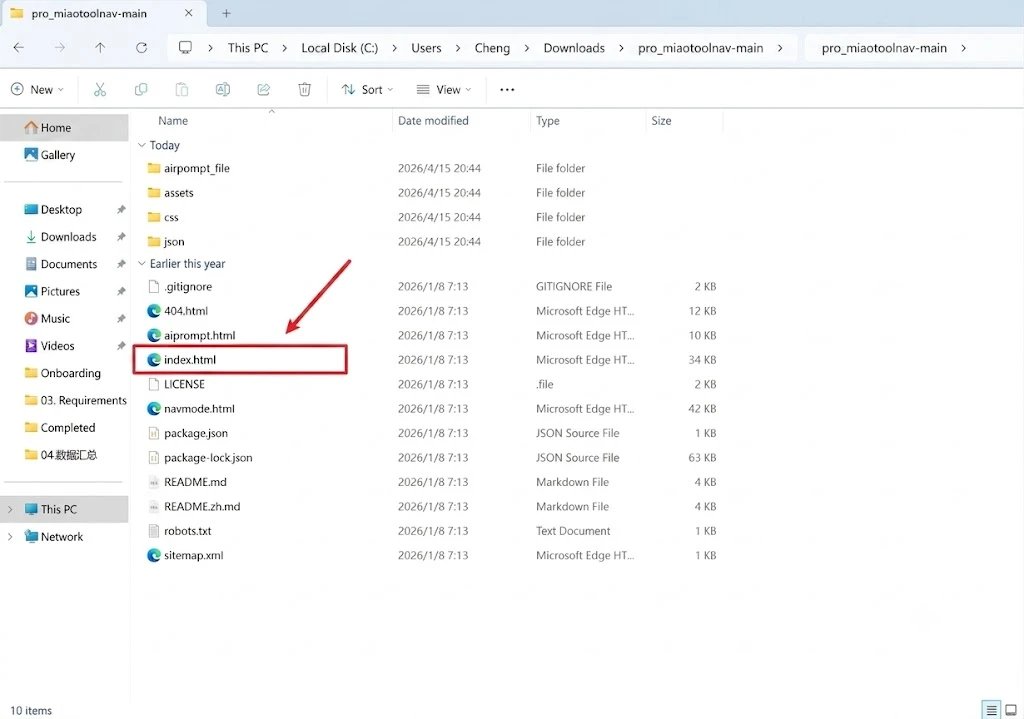
Step 2: Two Methods for Deploying to Netlify
Method 1: Direct Upload via Drag-and-Drop (Beginners Can Get Started in 10 Seconds)
Go to the Netlify dashboard homepage and click "Add a New Project."
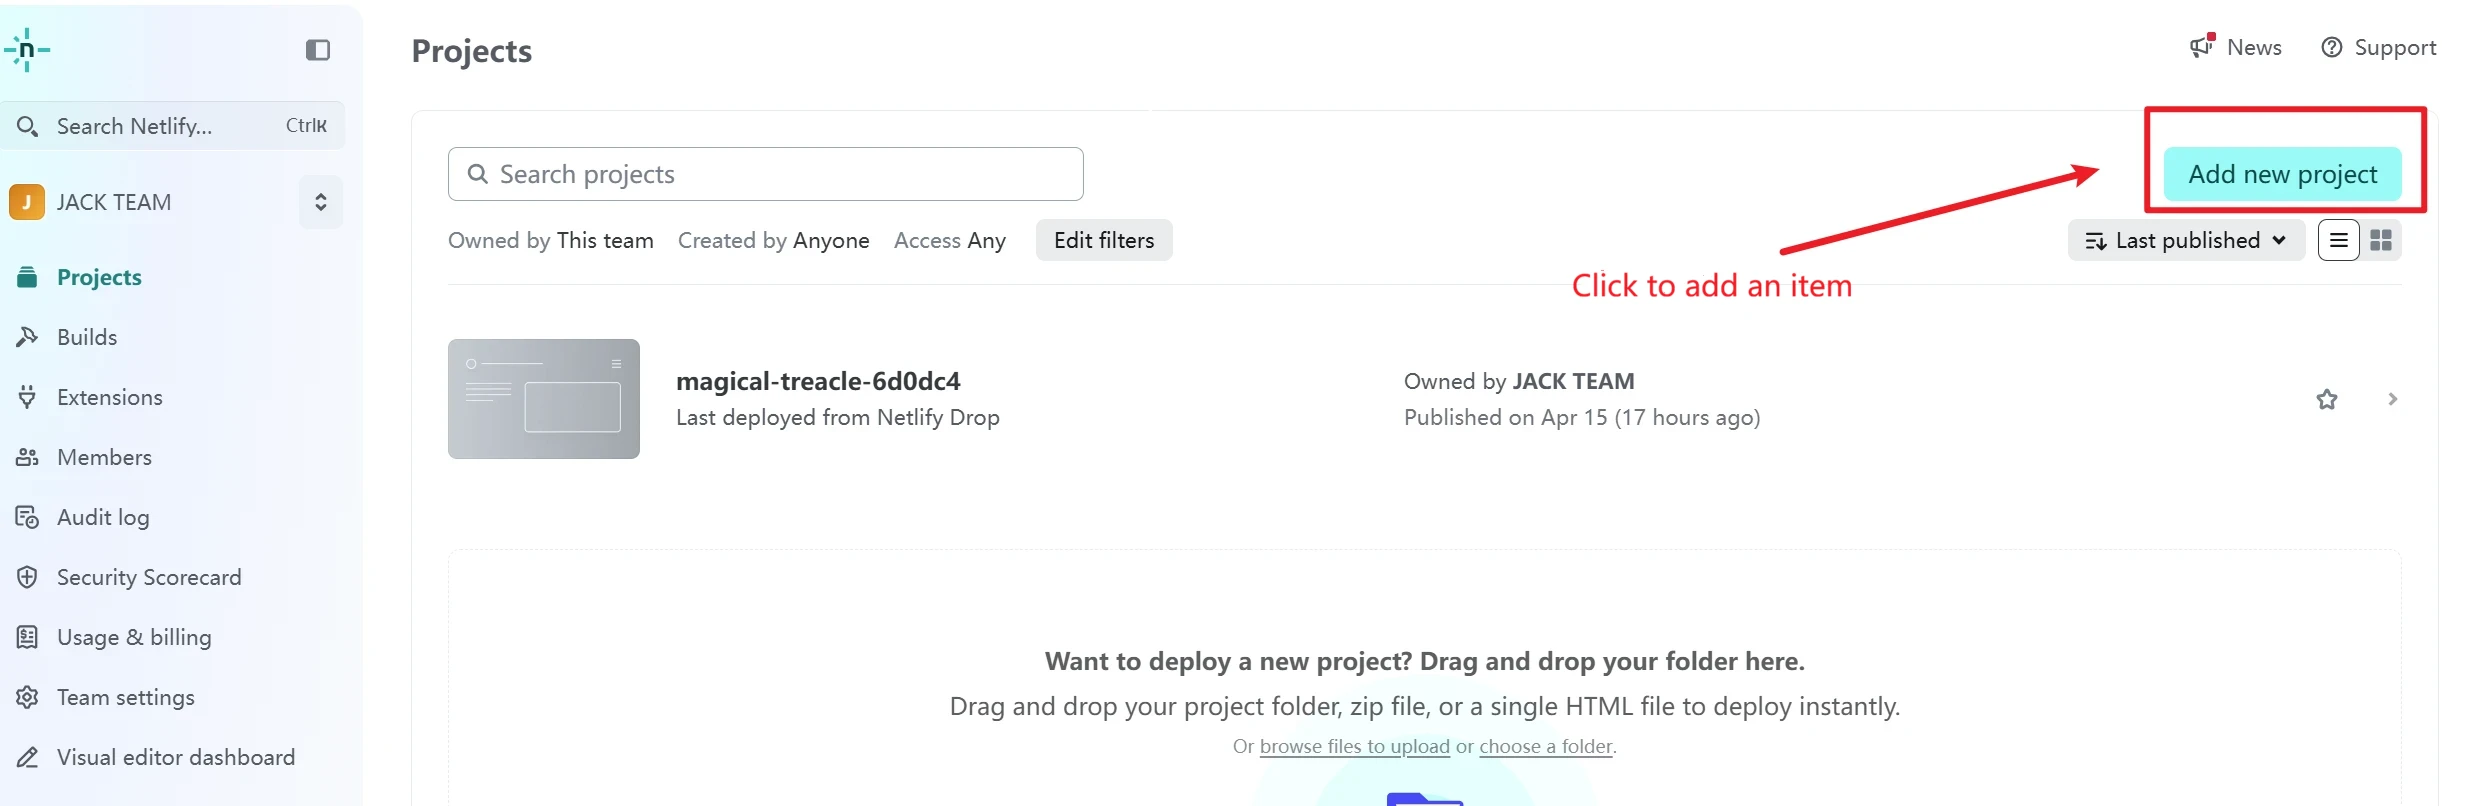
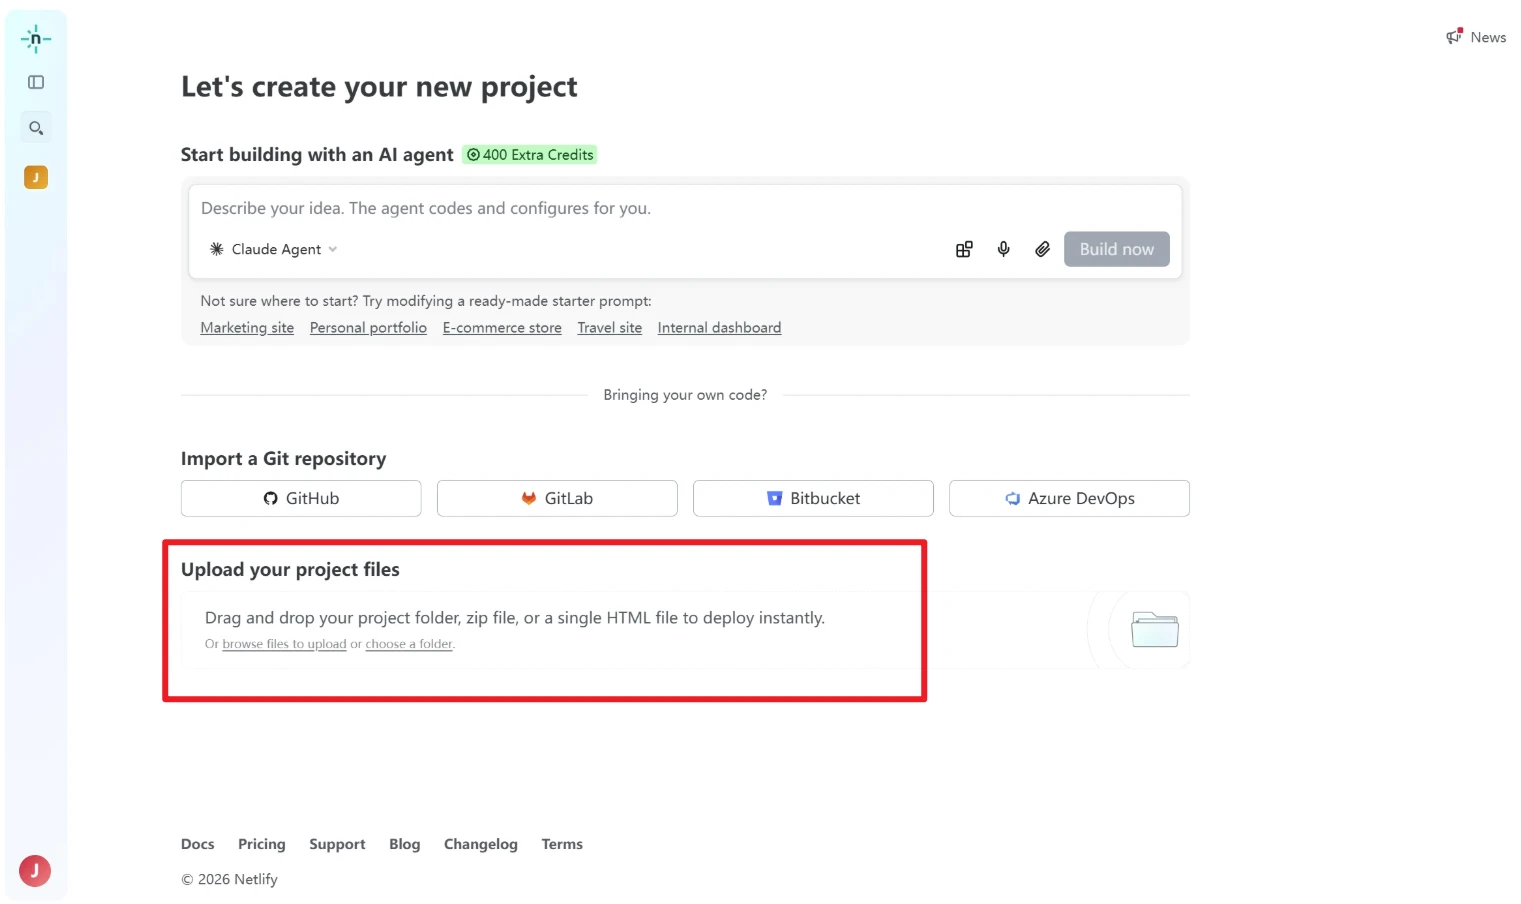
A will appear in the center of the pageUpload your project filesthe upload area.
将The entire website folder (do not compress)Drag it directly into this area.
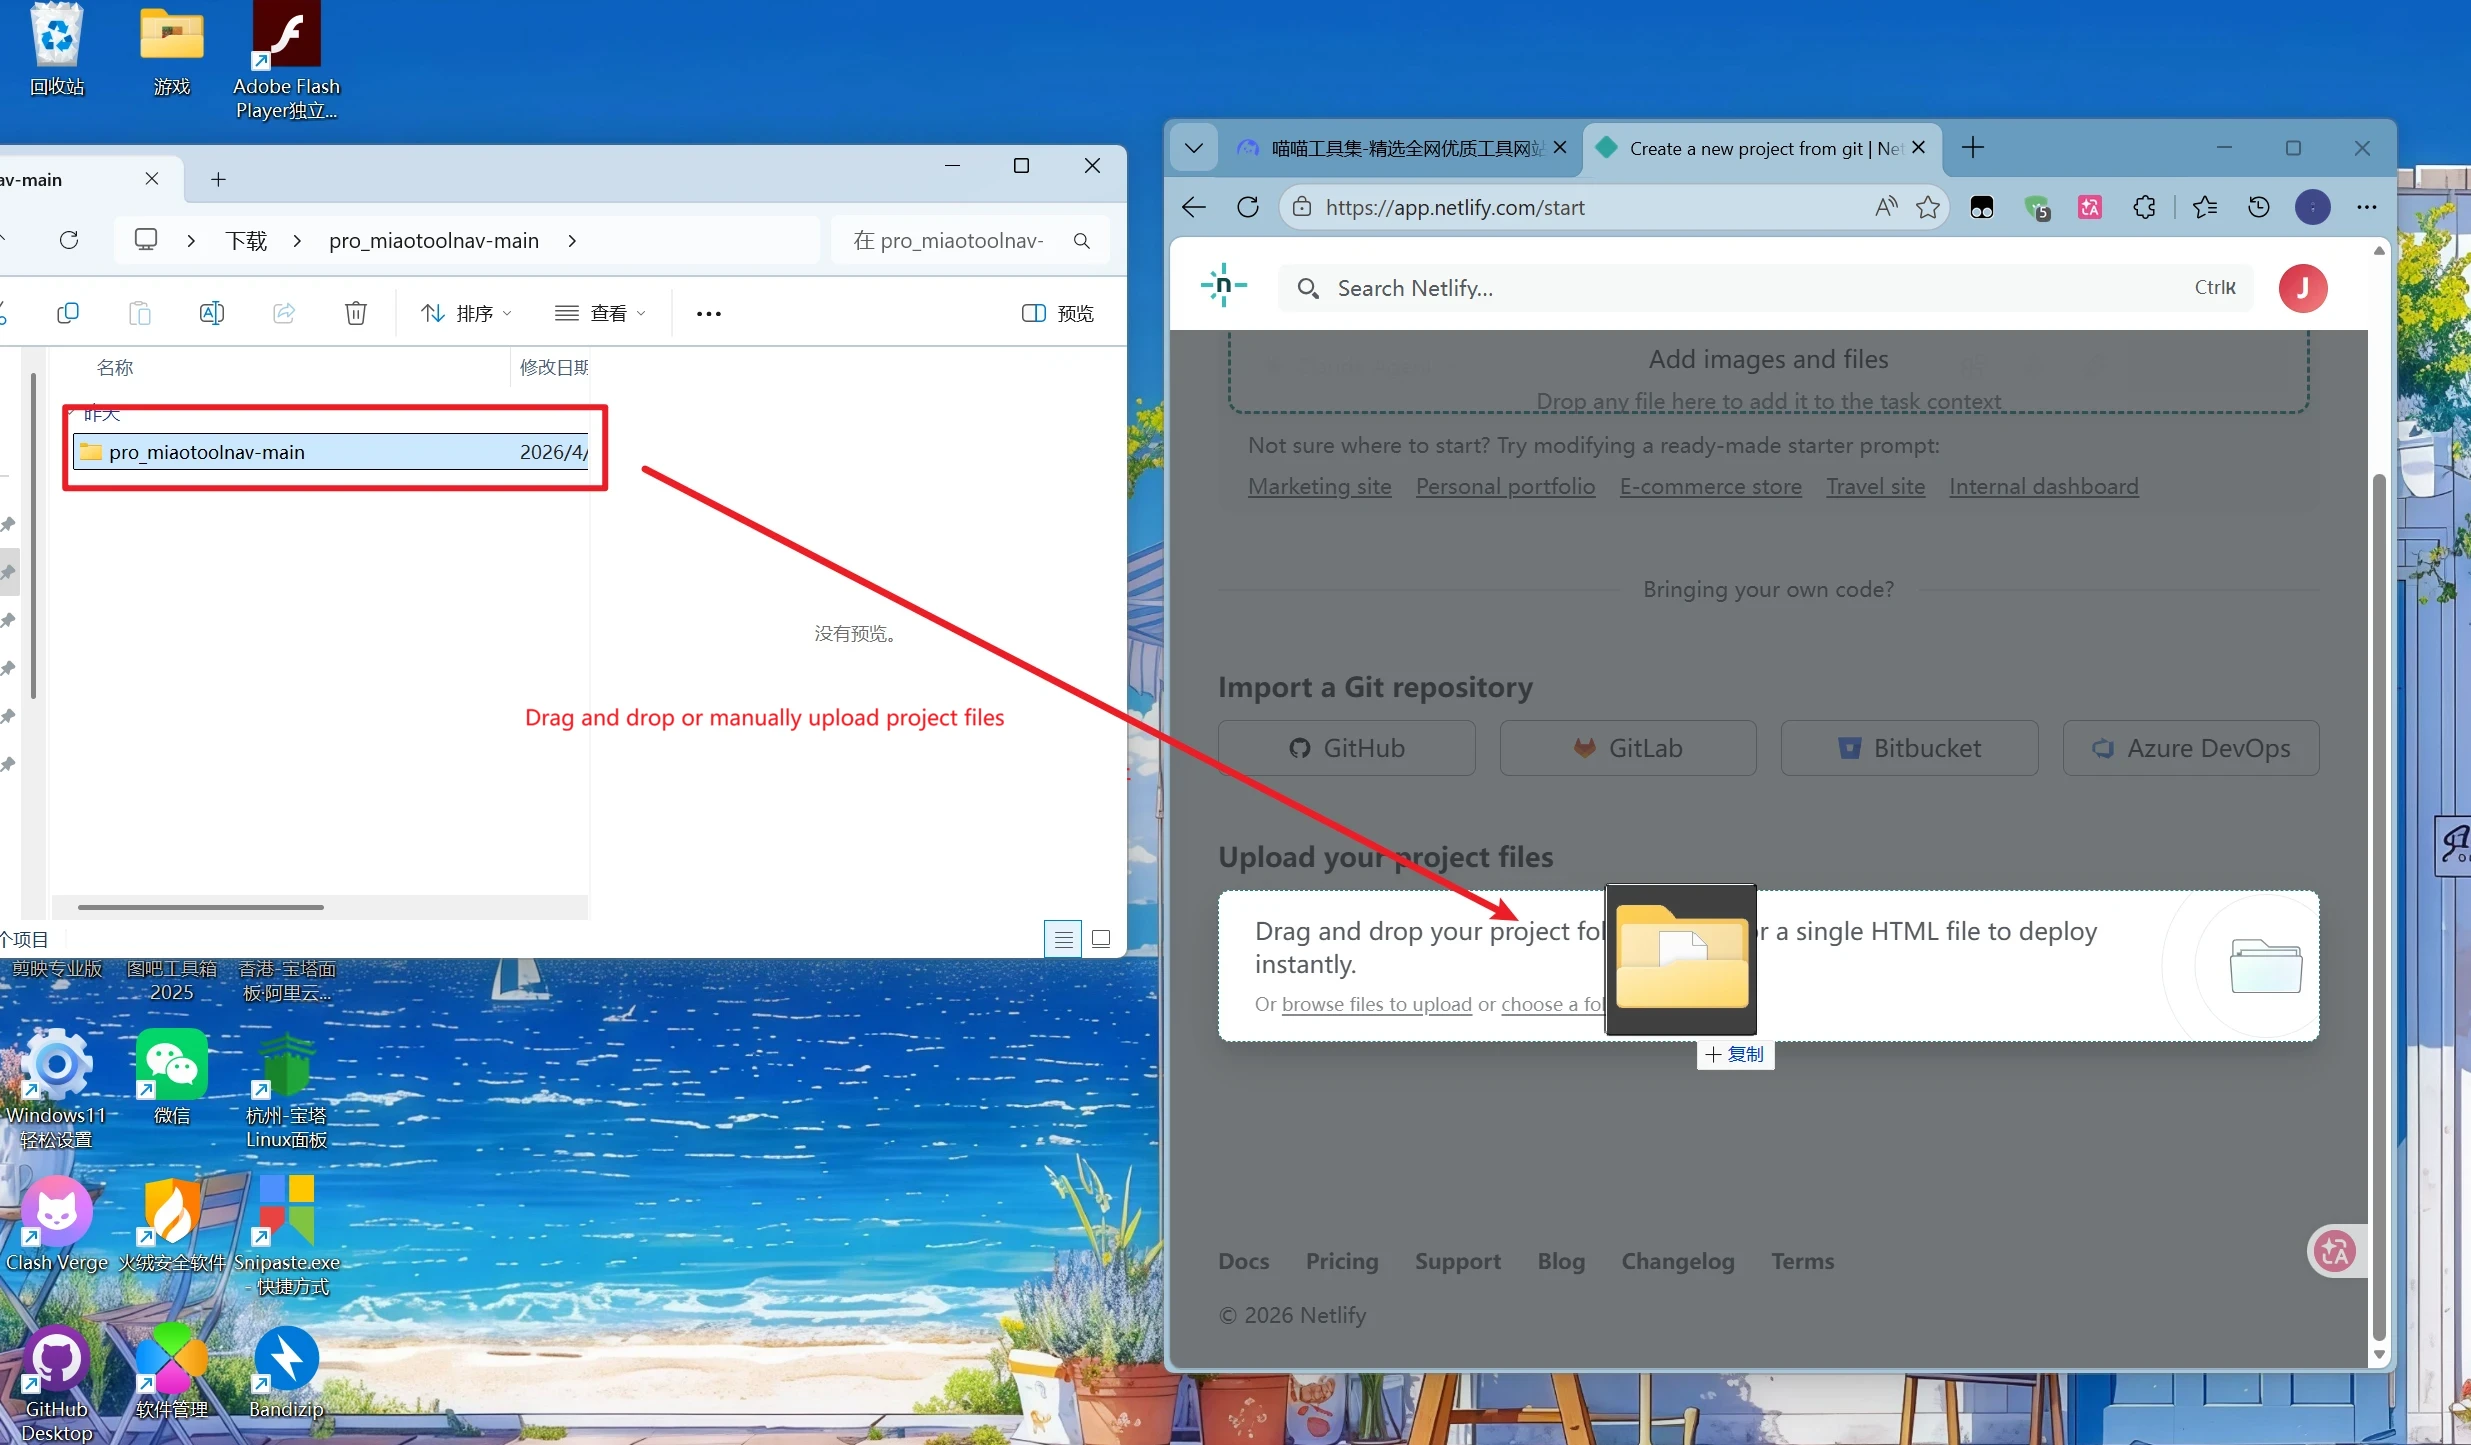
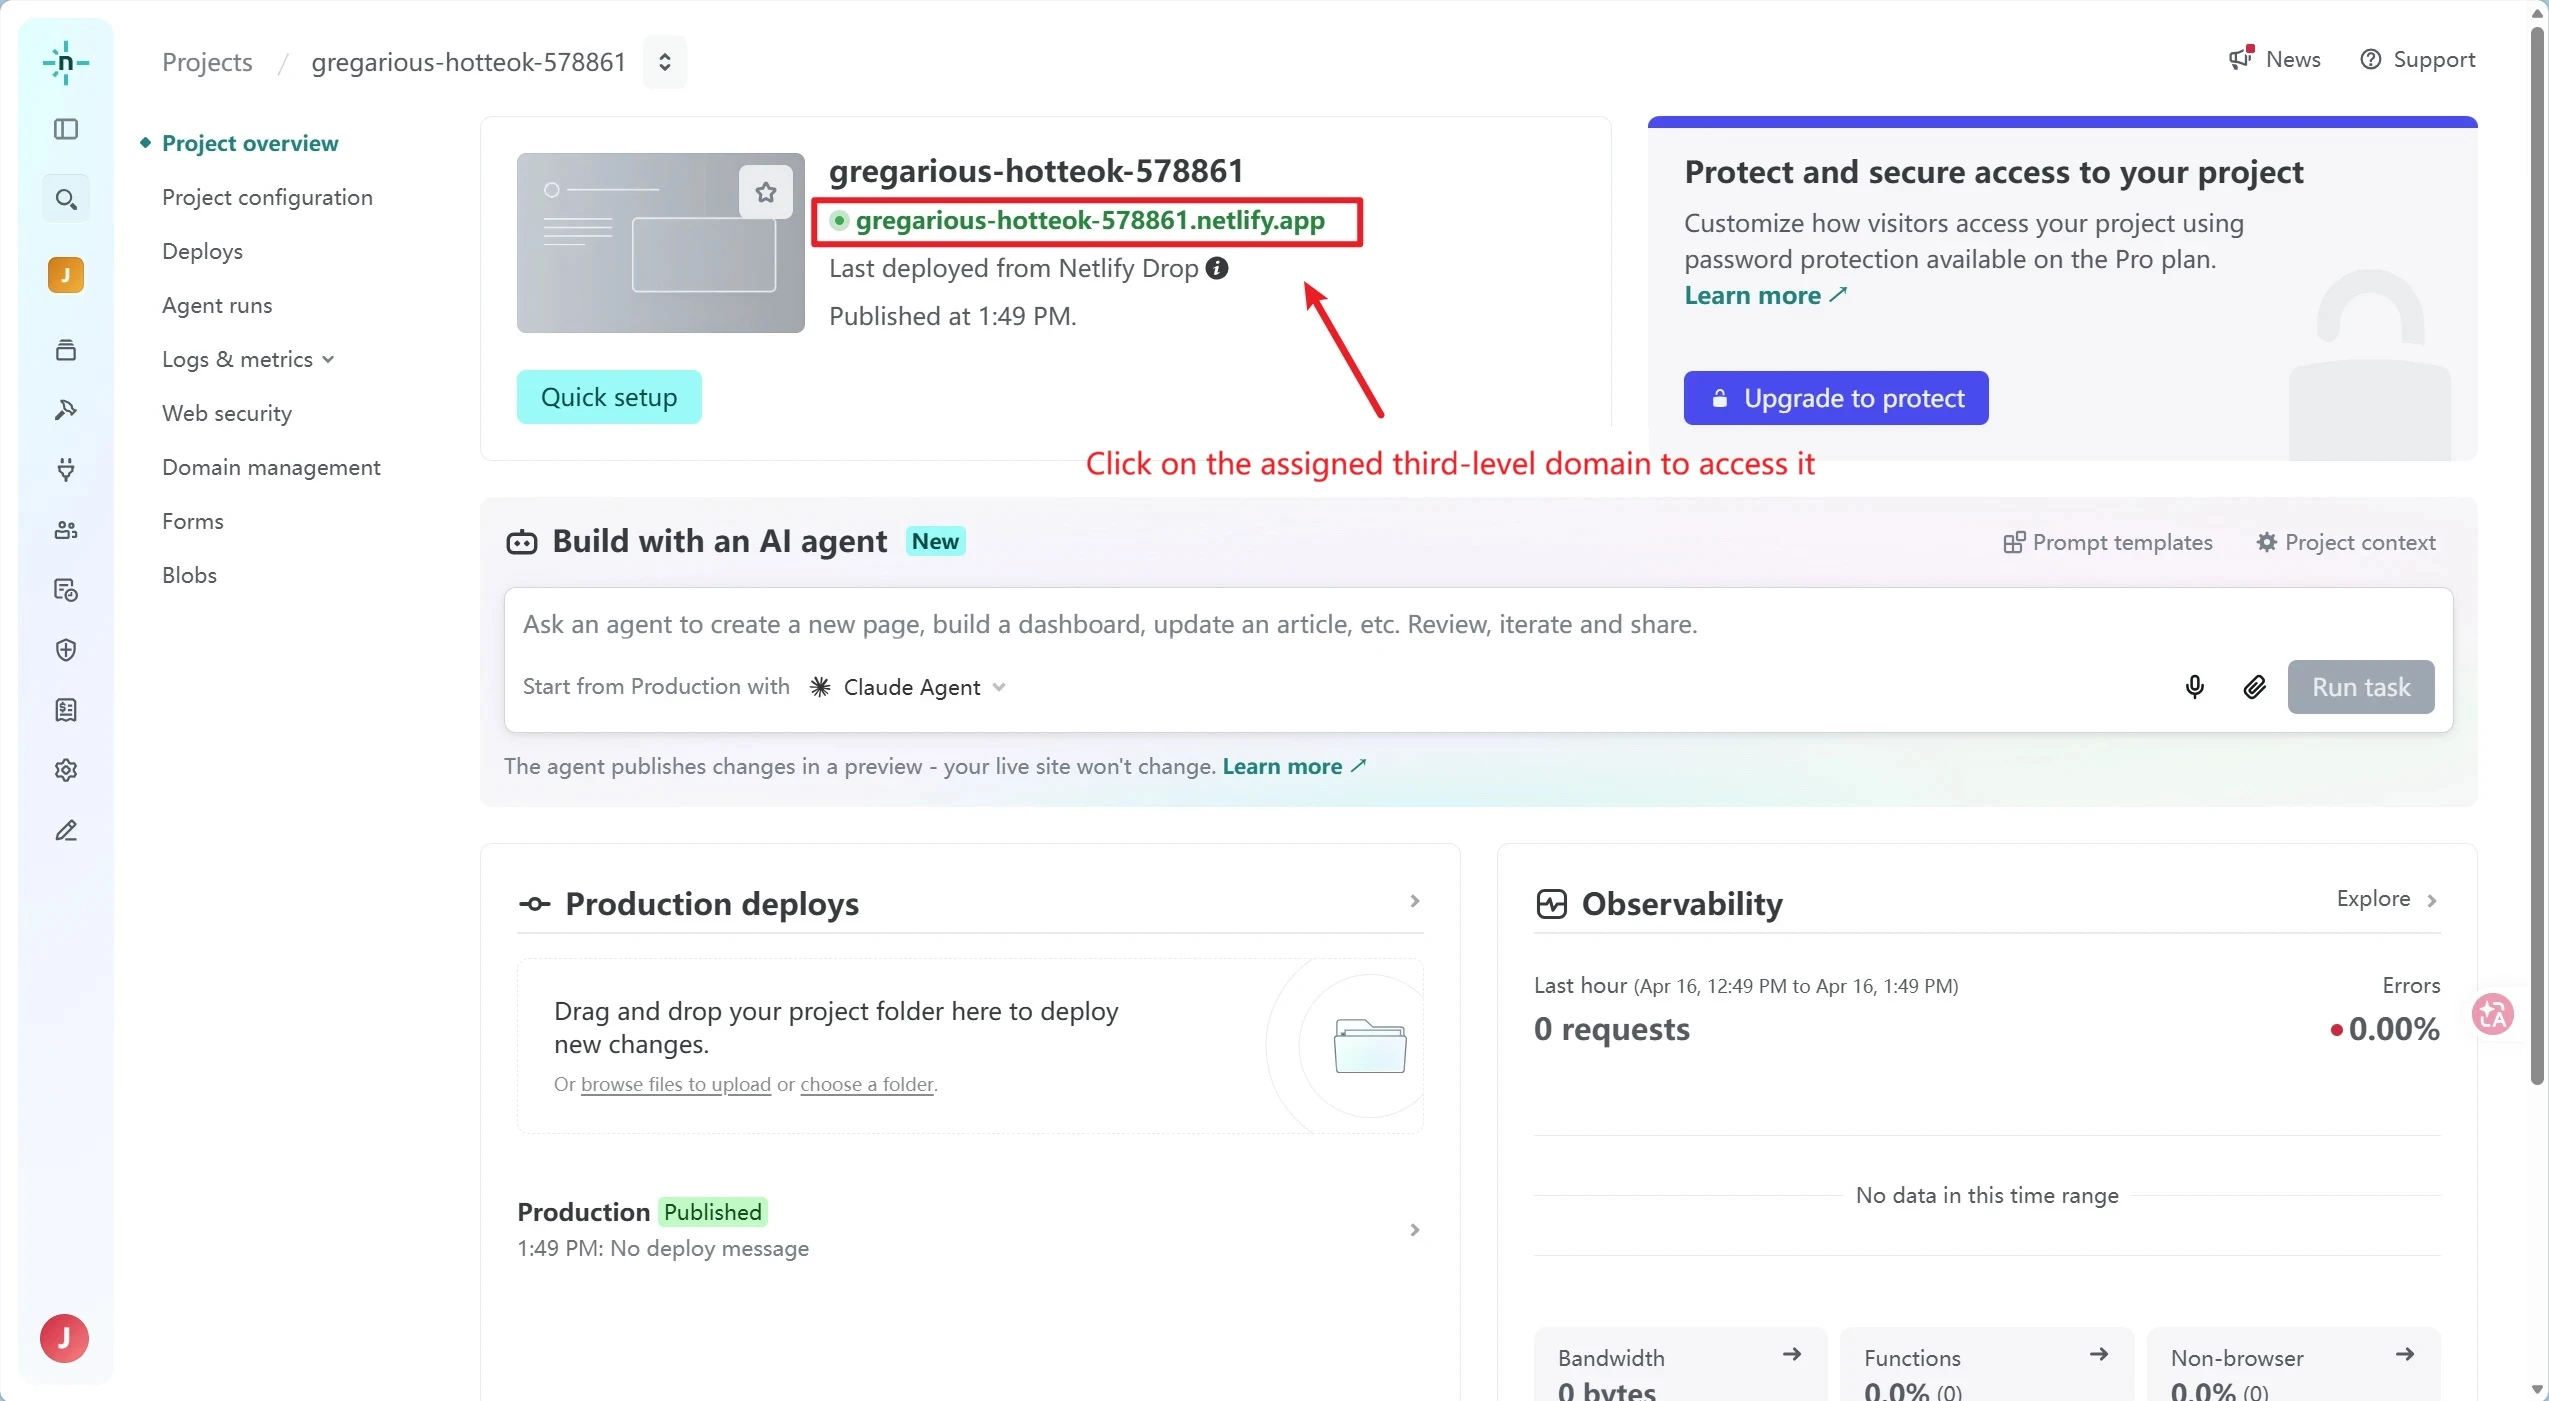
Please wait a few seconds for the automatic deployment to complete; the system will then generate xxx.netlify.app Free domain—click to visit the website.
Method 2: Automatic Deployment from a GitHub Repository (Suitable for Long-Term Maintenance)
Host your code on GitHub. After making changes locally and pushing them,Netlify Automatic Redeployment, suitable for websites that require frequent content updates.
Step 1: Upload the website code to GitHub
Create a new GitHub repository (public or private), and upload index.html Once all the website files have been placed inRepository Root Directory。
Step 2: Link GitHub to Netlify for Automatic Deployment
Netlify Dashboard → Click Add a new site
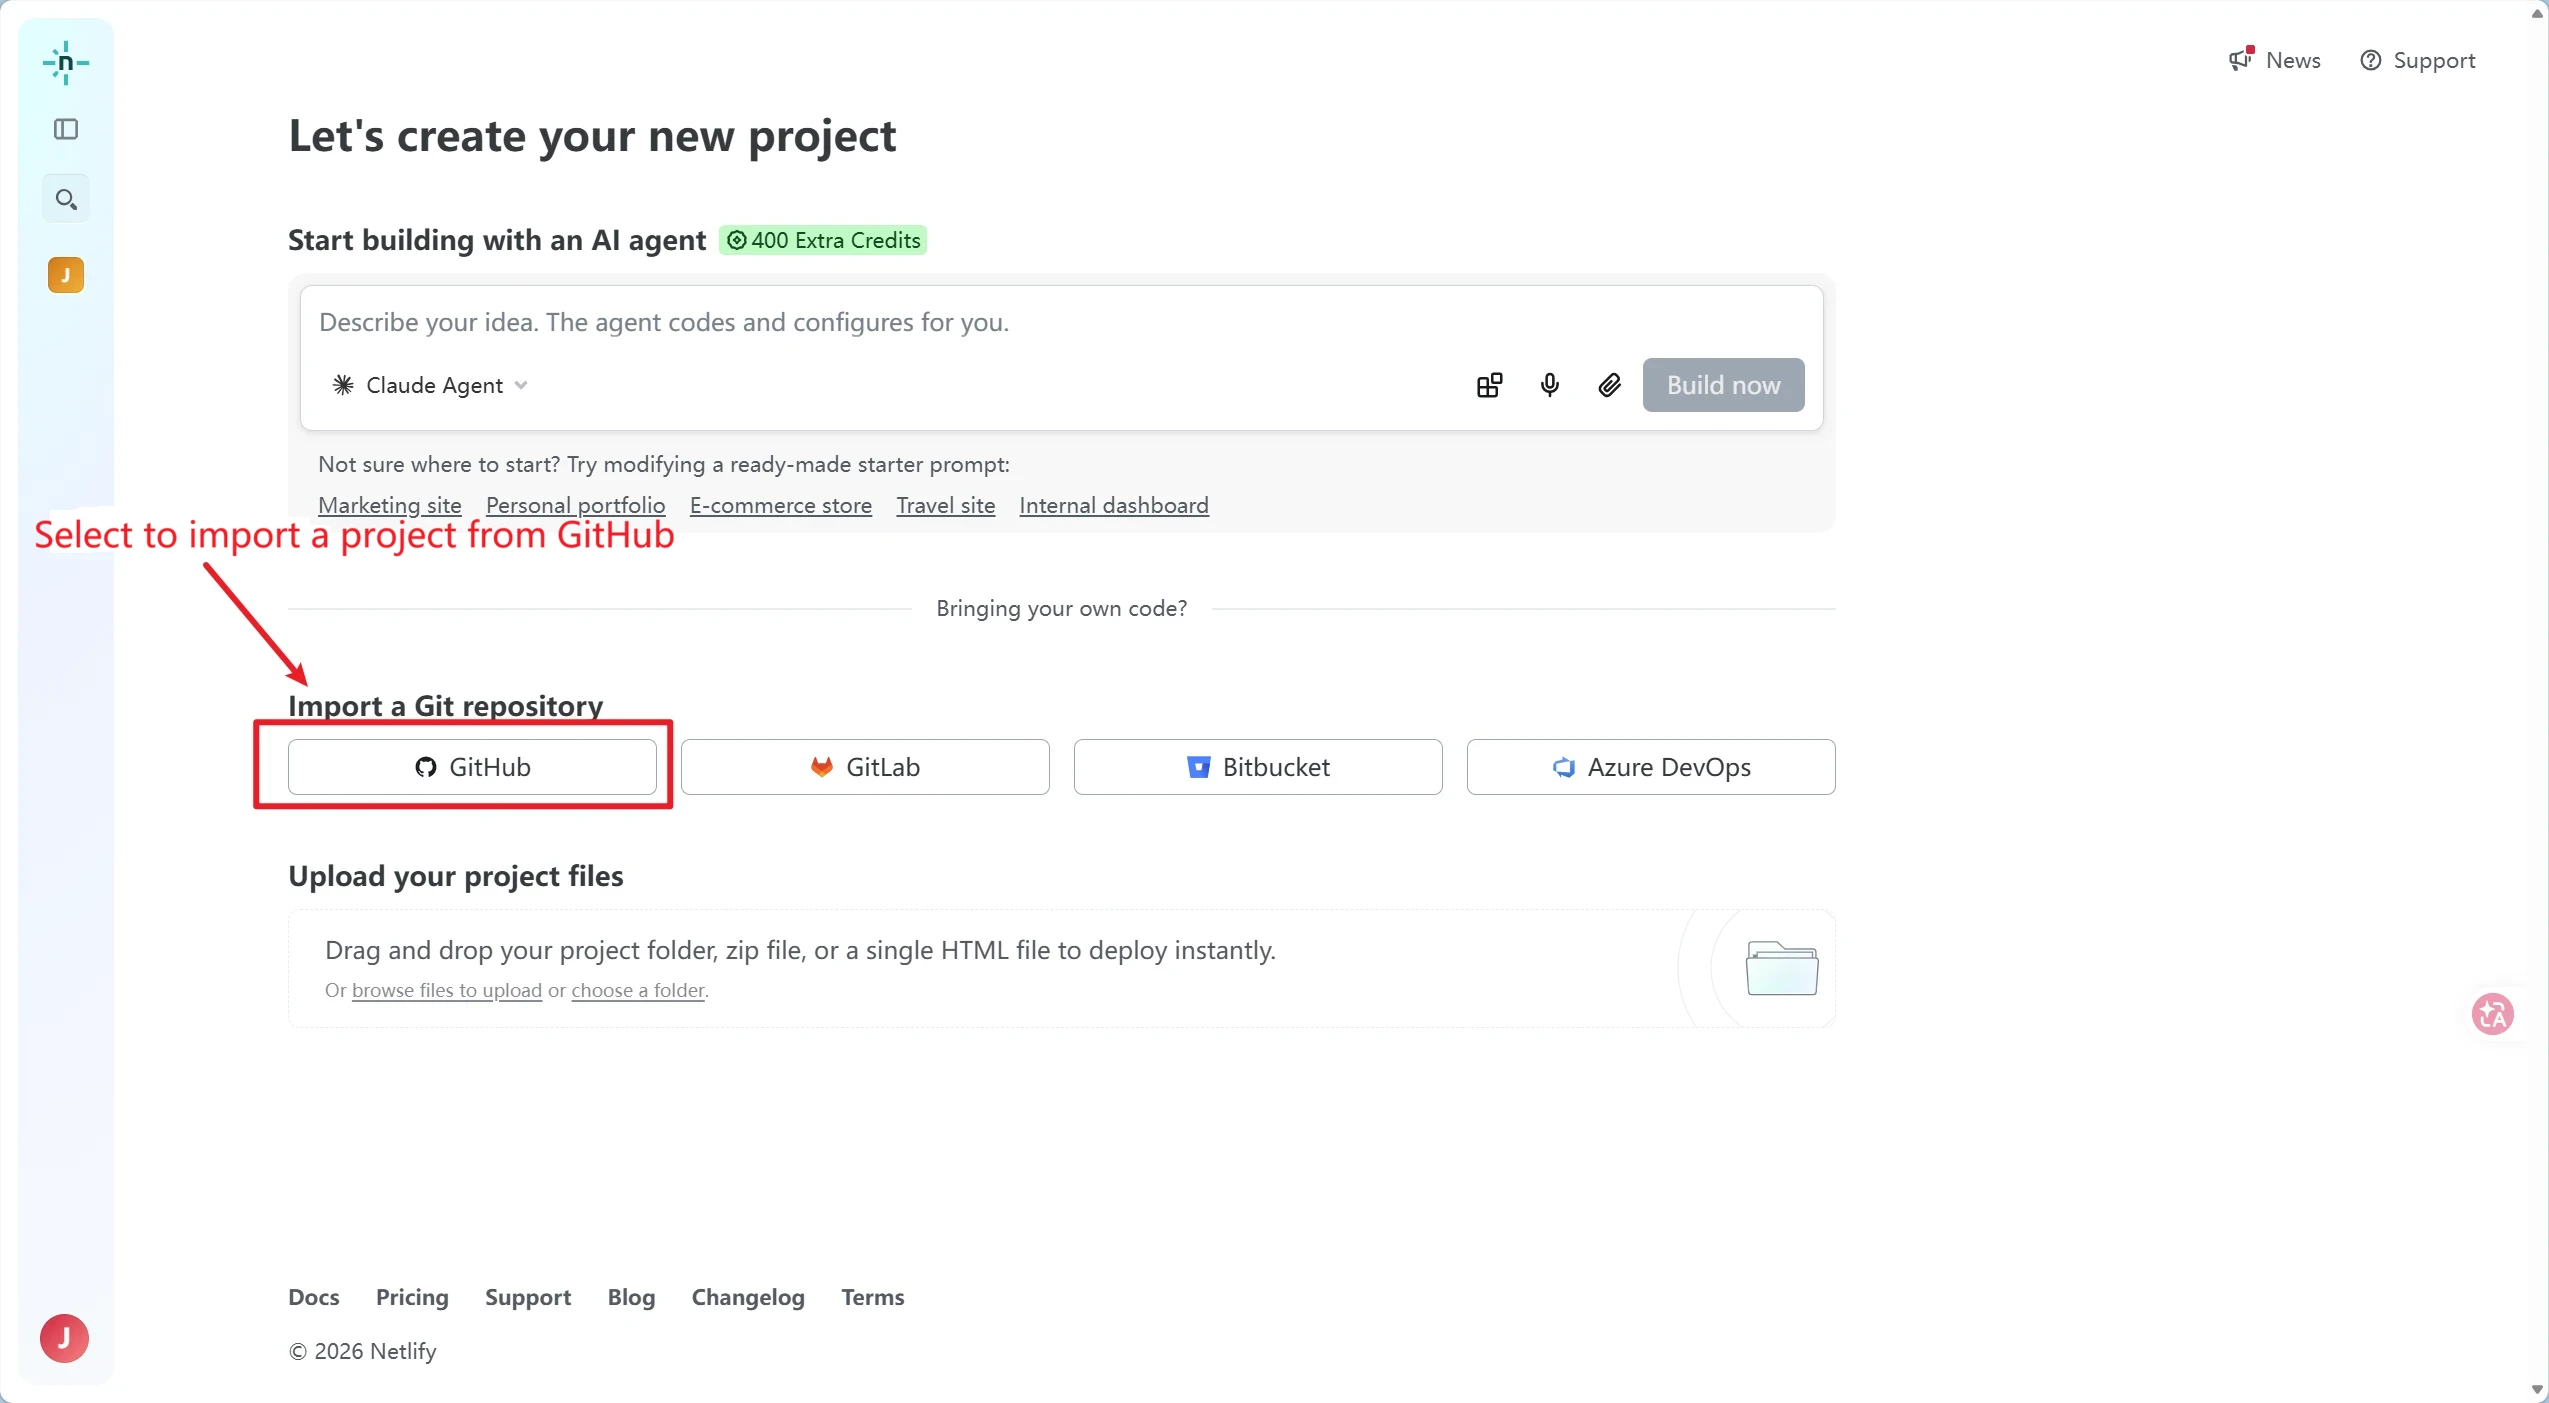
在 Import a repository Select from the options below GitHub Grant access, then select your website repository.
Static Website Deployment Configuration (Leave at default):
- Deployment Branch:
main - Build command: Leave blank
- Publish directory:
.
Click Deploy site, wait 10 seconds for the deployment to complete.
After that, all you need to do is update the code on GitHub, and Netlify willAutomatic Redeployment。
Step 3 (Optional): Link a Custom Domain
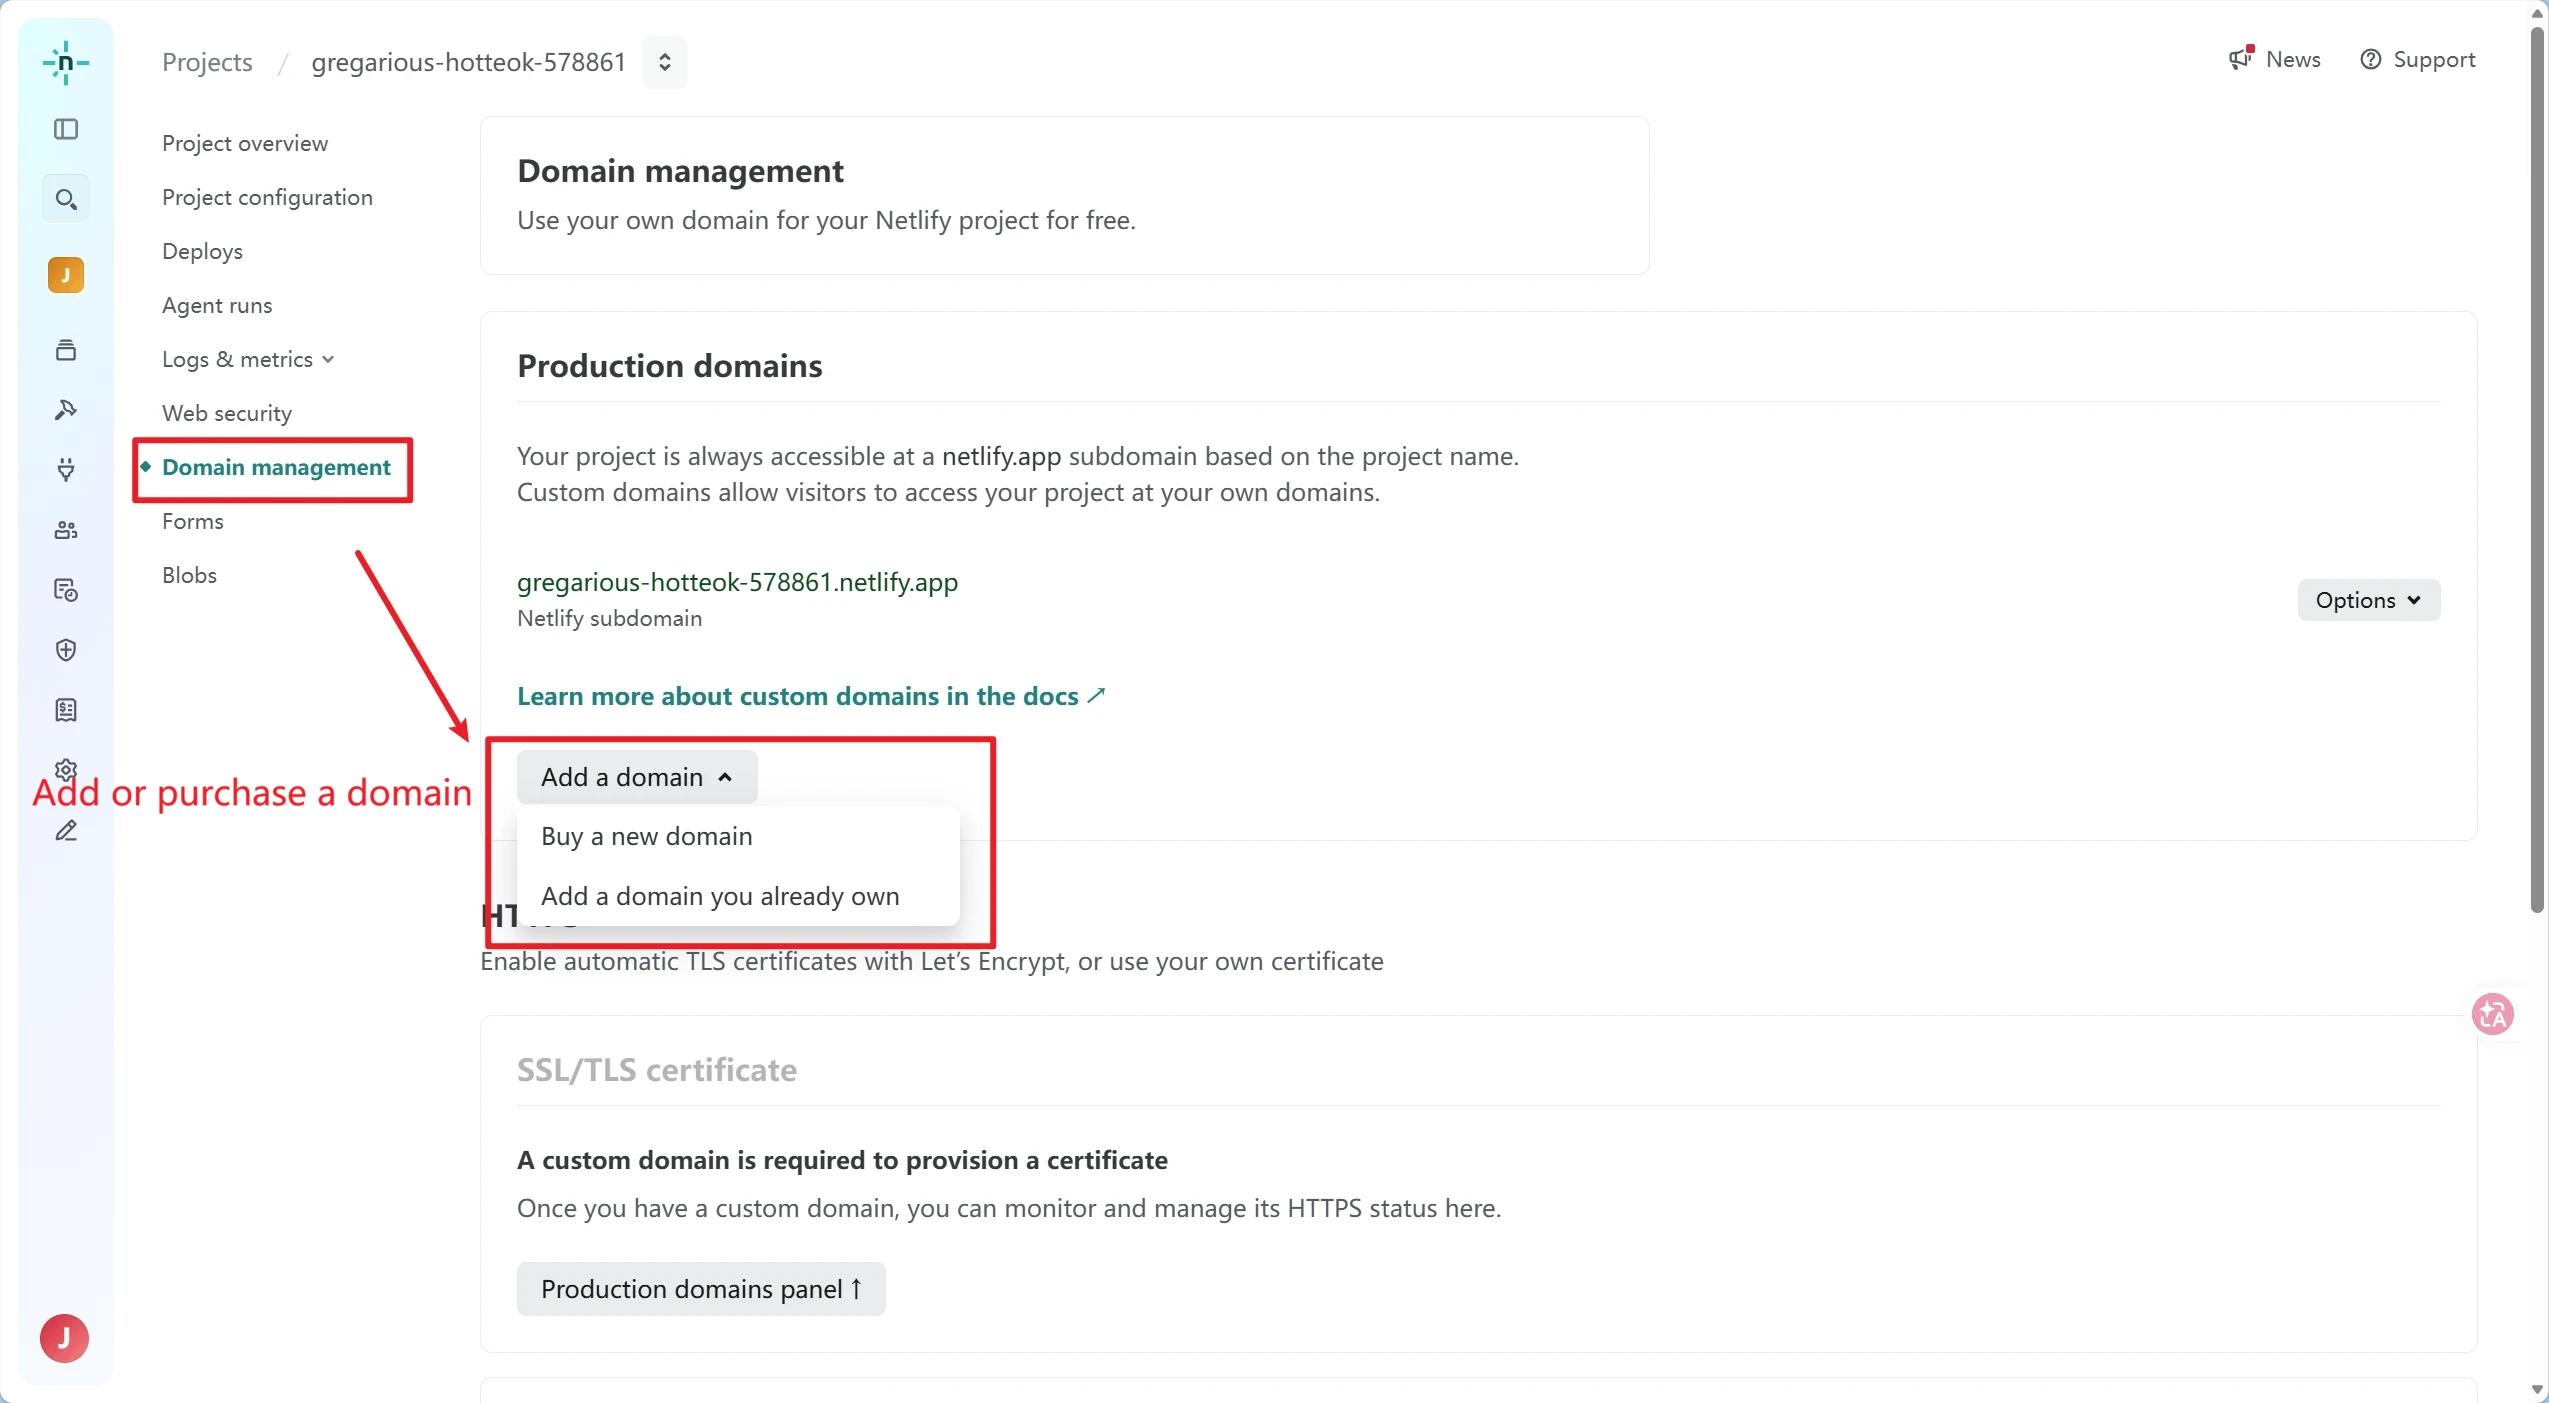
Go to the website's admin panel → Domain Management → Add domainHere, you can choose from various options to purchase a domain or enter your own custom domain directly.
Once the binding is successful, Netlify willAutomatic, Free SSL Certificate Configuration, supports secure HTTPS access.
Frequently Asked Questions (FAQ)
Q1: Can I use the free version of Netlify long-term?
Individuals setting up static websites, blogs, or tool pages can use the service for free indefinitely. The free plan includes 100 GB of global CDN traffic per month, an automatic SSL certificate, and unlimited site deployments. Most personal projects will not exceed these limits; if you do exceed the traffic allowance, your site will not be taken down—it will simply be temporarily throttled, and your traffic allowance will automatically reset the following month.
Q2: What should I do if I get a 404 error page after deploying to Netlify?
In most cases, this is because the website project’s root directory lacks an `index.html` homepage file. Do not place the page in a subfolder; instead, place `index.html` in the top-level directory. For single-page routing 404 errors, you need to add a redirect rule in the admin panel.
Q3: After deploying a website via drag-and-drop, how do I sync local code changes to the production environment?
Drag-and-drop uploads are a one-time, static deployment method with no automatic synchronization capabilities. To update the site, you must delete the existing site and drag and drop the entire project folder again. For long-term iteration and maintenance, we recommend using GitHub-integrated deployment, where Netlify automatically packages and deploys the site after you commit code to Git locally.
Q4: Can the free xxx.netlify.app domain automatically generated by Netlify be customized?
Custom prefixes are supported. Go to the site’s admin panel → Domain Management, click the Edit button to the right of the default domain to change the name. As long as the target domain hasn’t been registered by another user, the change will take effect immediately at no additional cost.