
We've tried that before Deploying a Website Statically Using Netlify, Let's talk about Vercel. It is a product developed by the Next.js team. Its core philosophy is to let you focus solely on your code without having to worry about server-related issues, and it offers lightning-fast online deployment.
Step 1: Preparations Before Deployment
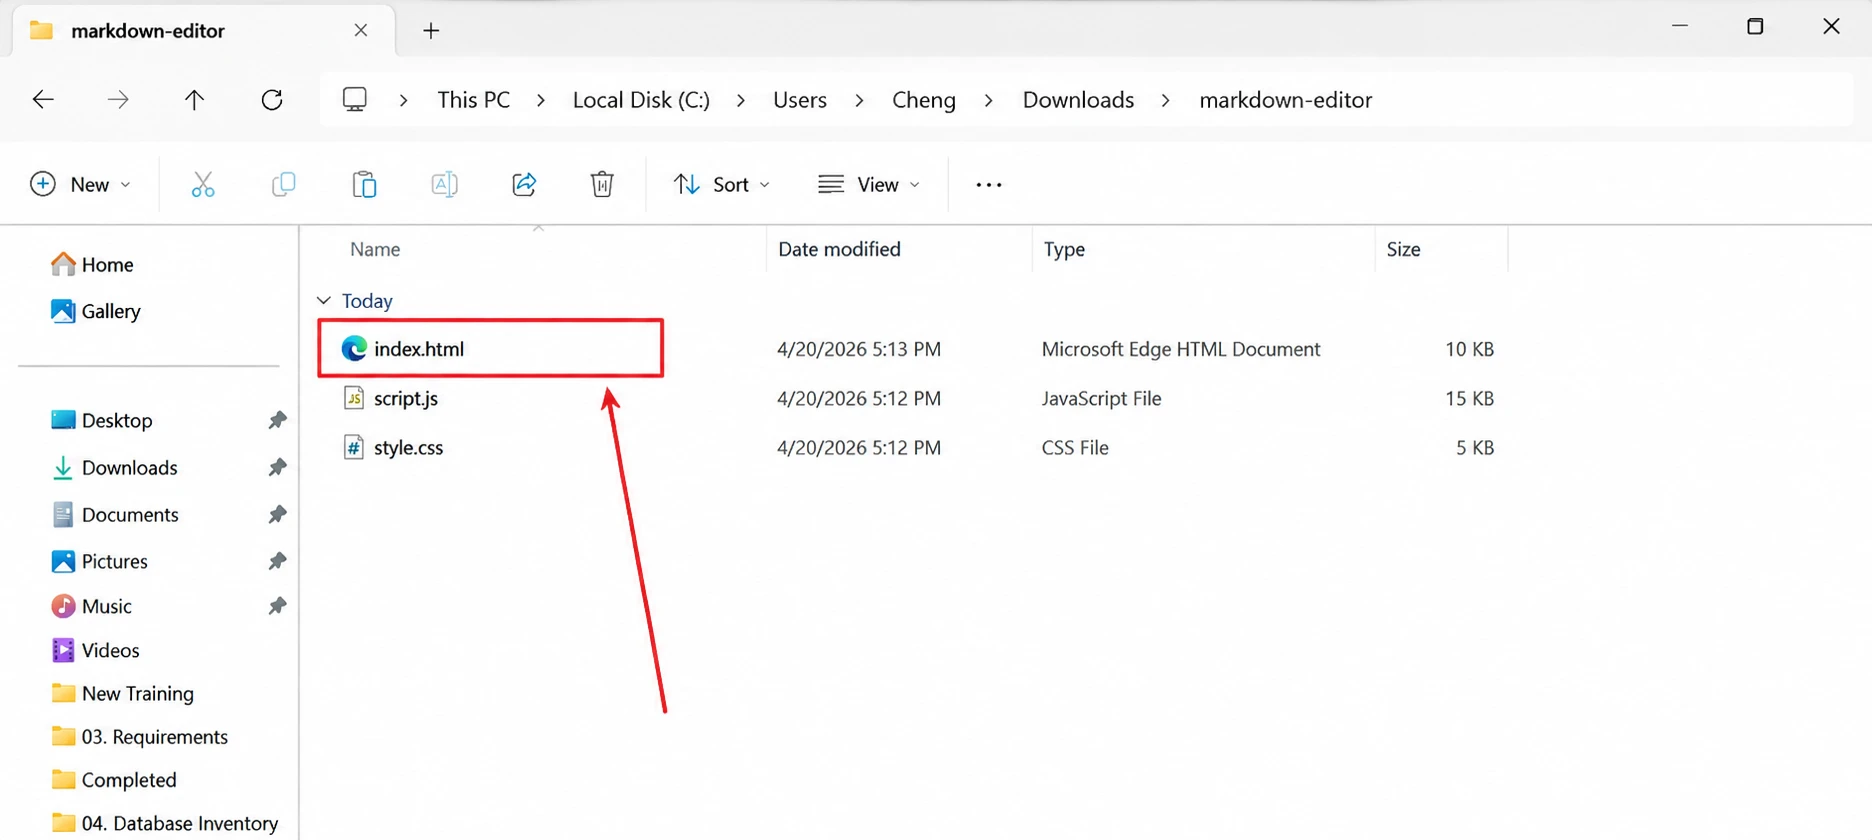
Prepare the code for your static website
There is only one foundation for the entire deployment:There must be a file in the project's root directory named index.html Documents. This is a prerequisite for Vercel to recognize a static website; if this file is missing, the deployment will result in a 404 error.
Tip: Place all the CSS, JavaScript, images, and other files you’ll need in the same folder, and make sure to use relative paths. This will prevent resource errors from occurring once the project goes live.
Sign up for GitHub and upload your project
If you don't have a GitHub account, go to GitHub Sign up for an account, then upload your project.
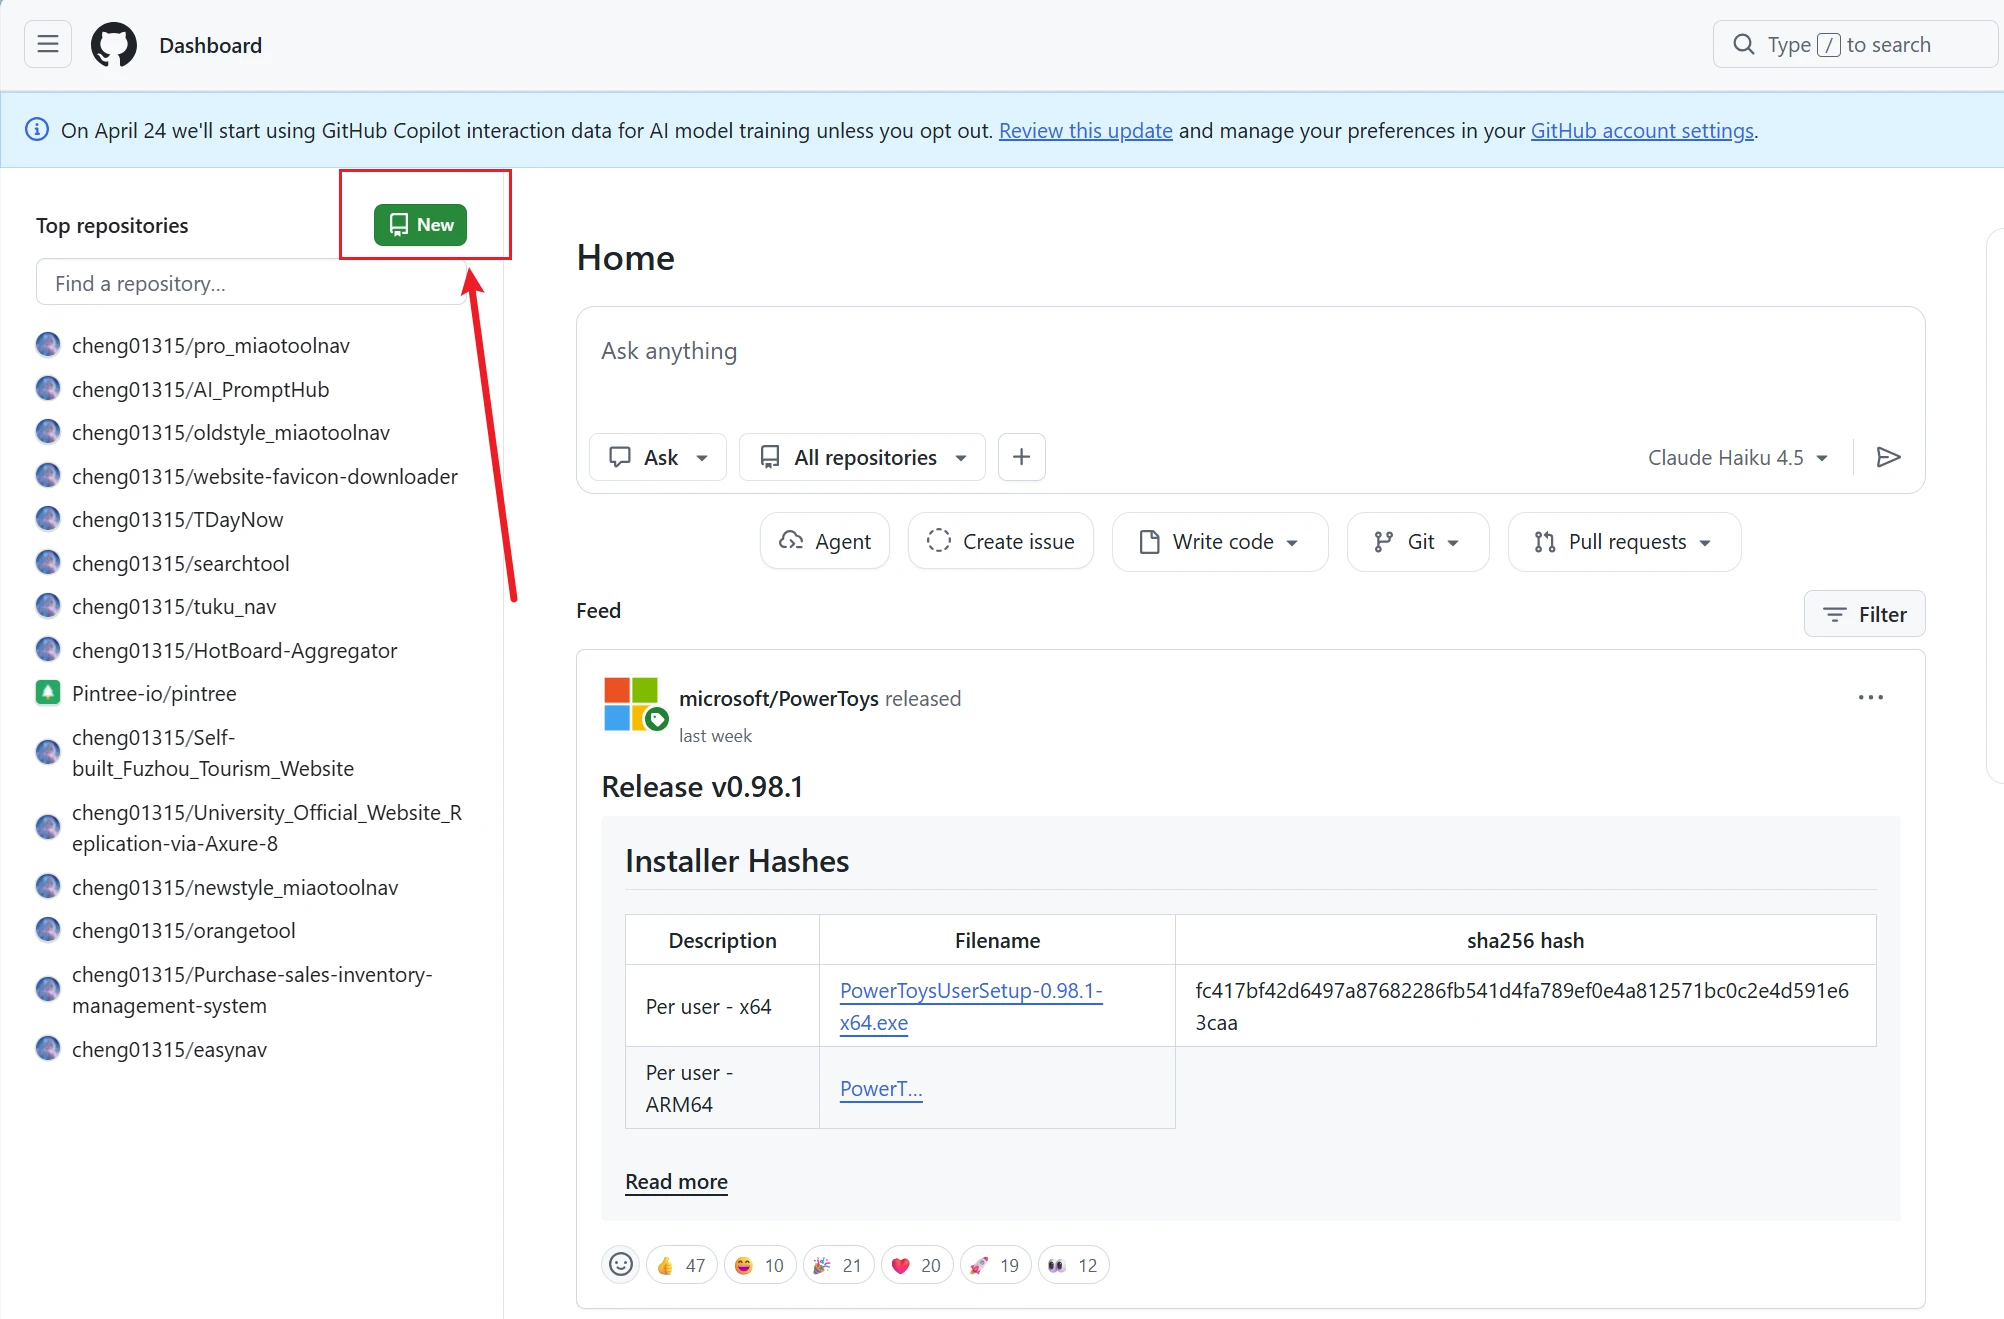
① After logging in, click the button in the upper-right corner “+” → “New repository” Create a new warehouse.
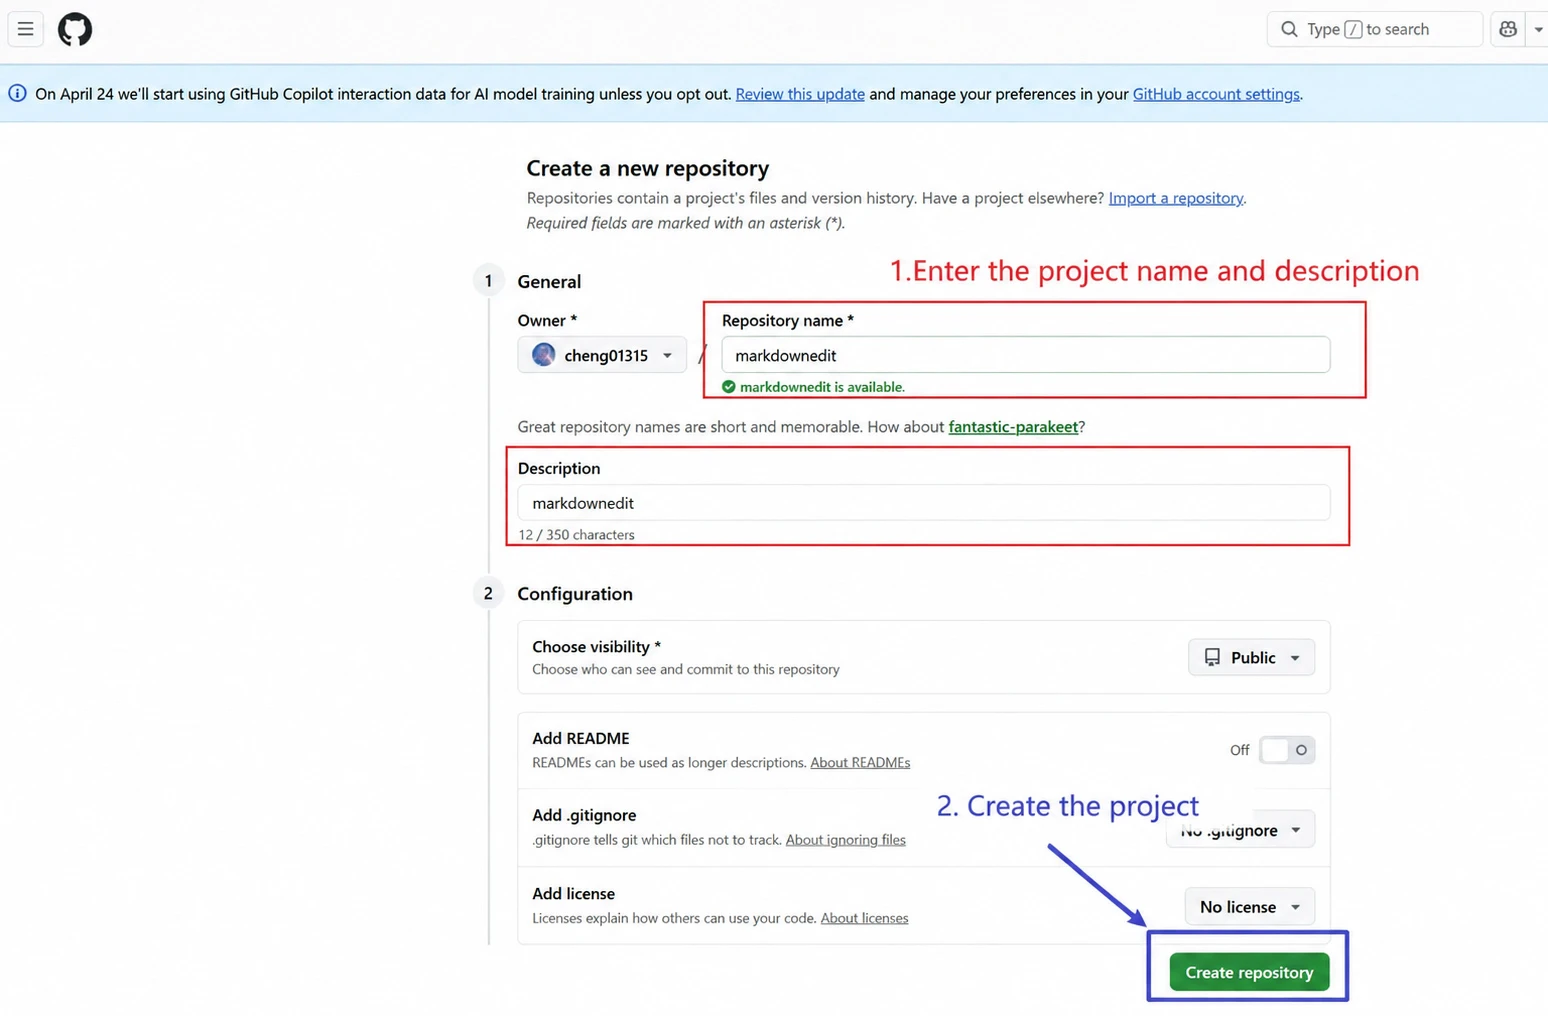
② Enter the project name, then click “Create repository”。
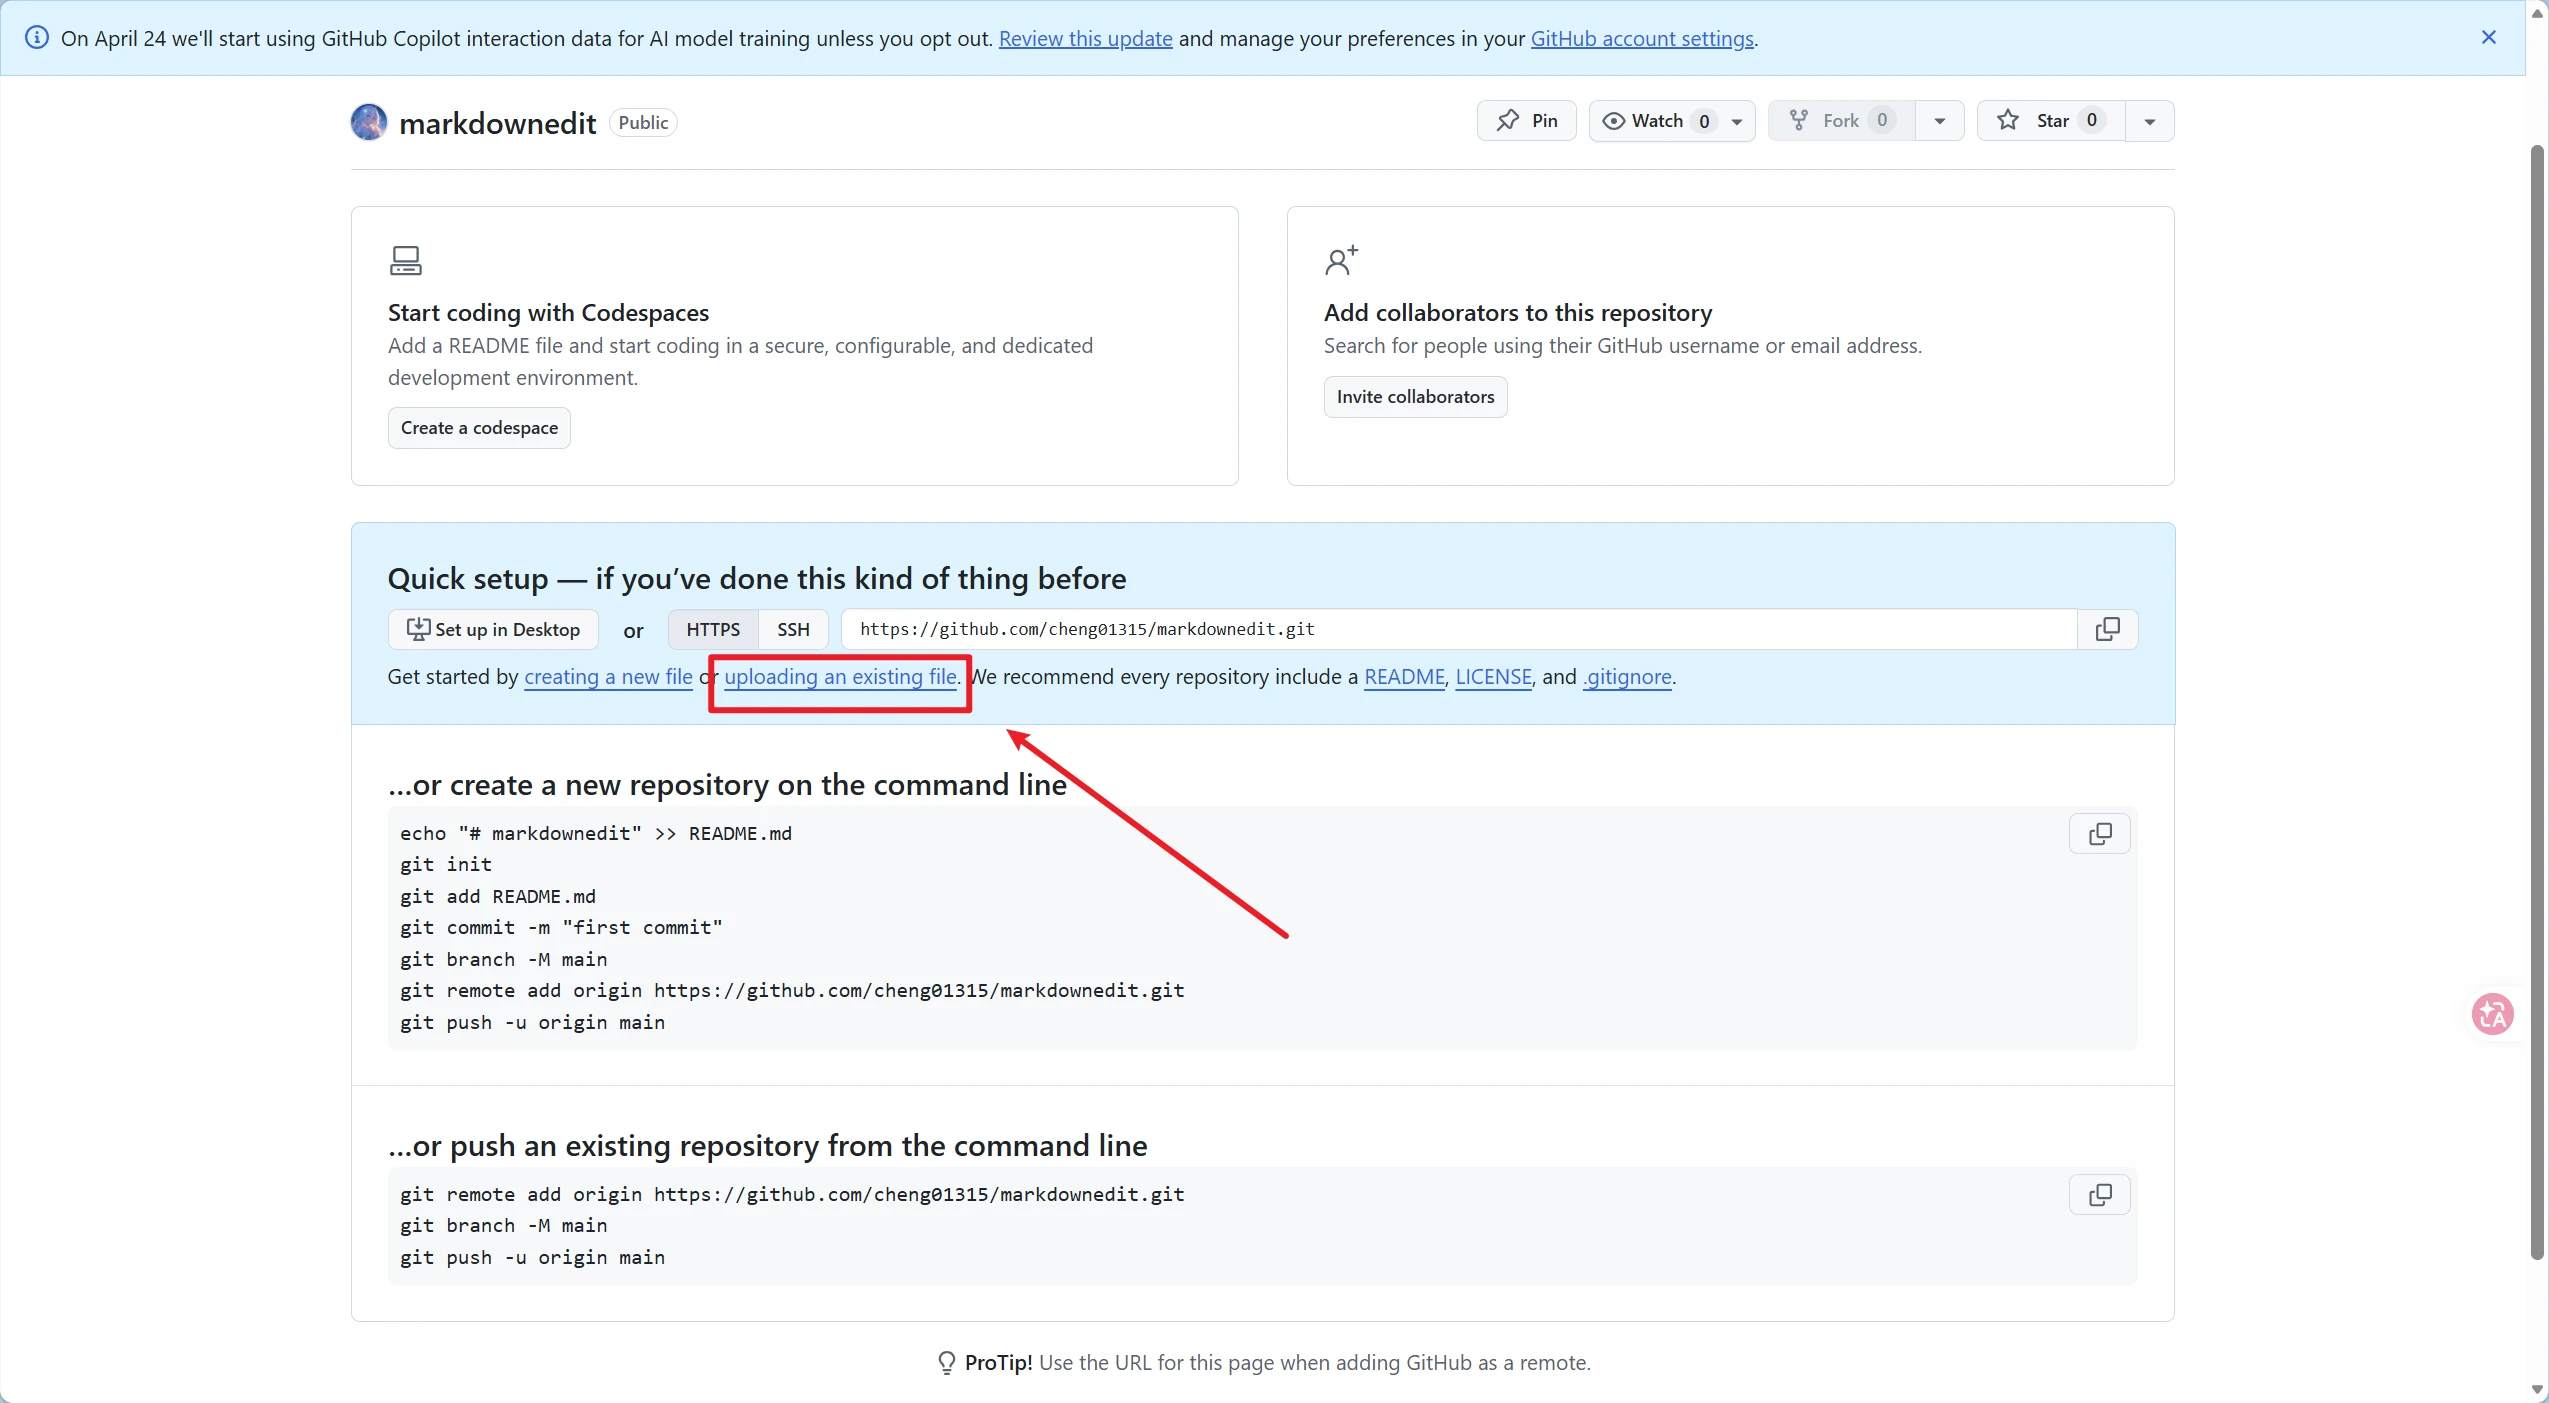
③ Once it's set up, click “Uploading an existing file”, drag your web page file into it, and then click “Commit changes” Submit.
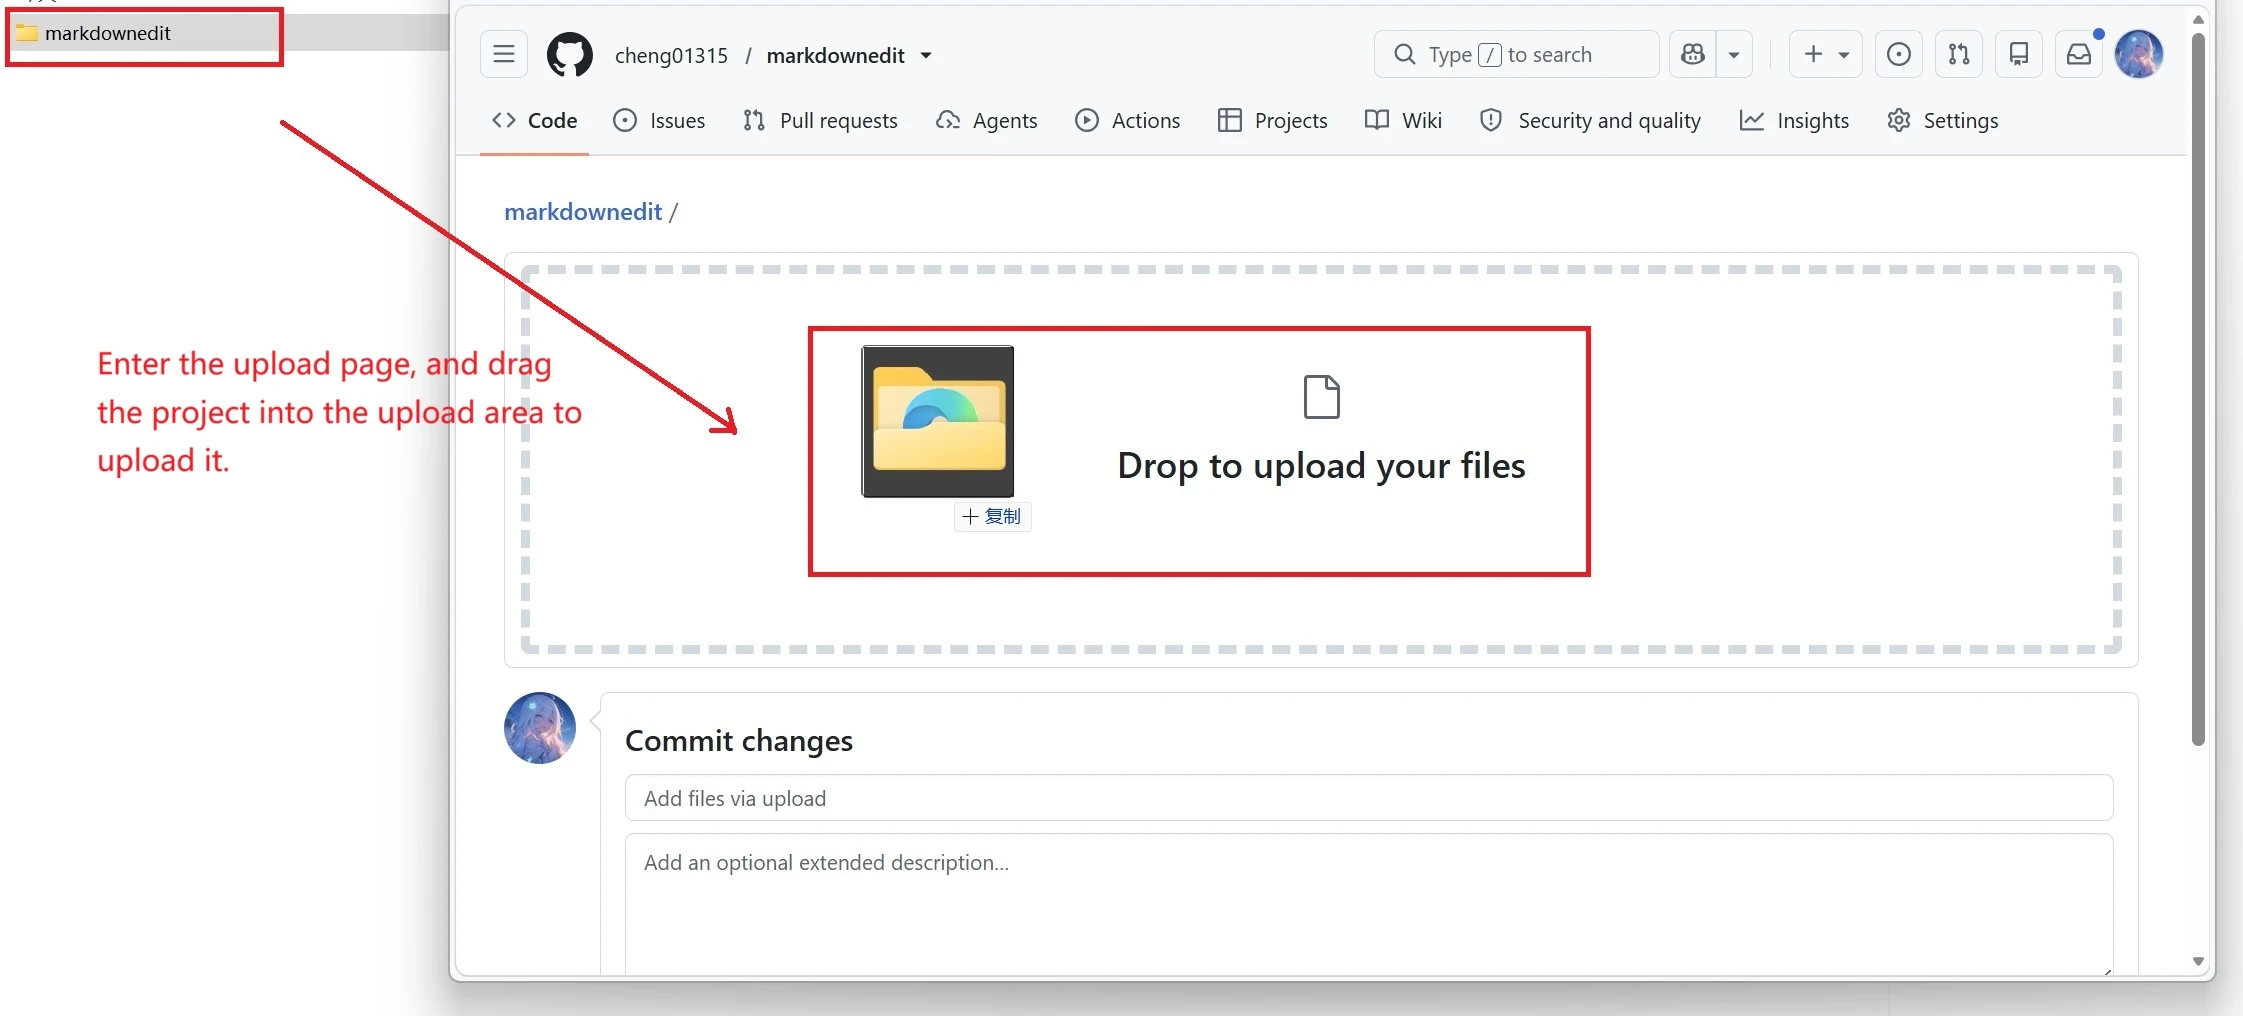
Step 2: Import and deploy with one click using Vercel
Sign up and connect to Vercel
Open Vercel Official Website, click on the page Sign Up
Then select Continue with GitHub Log in directly with your GitHub account.
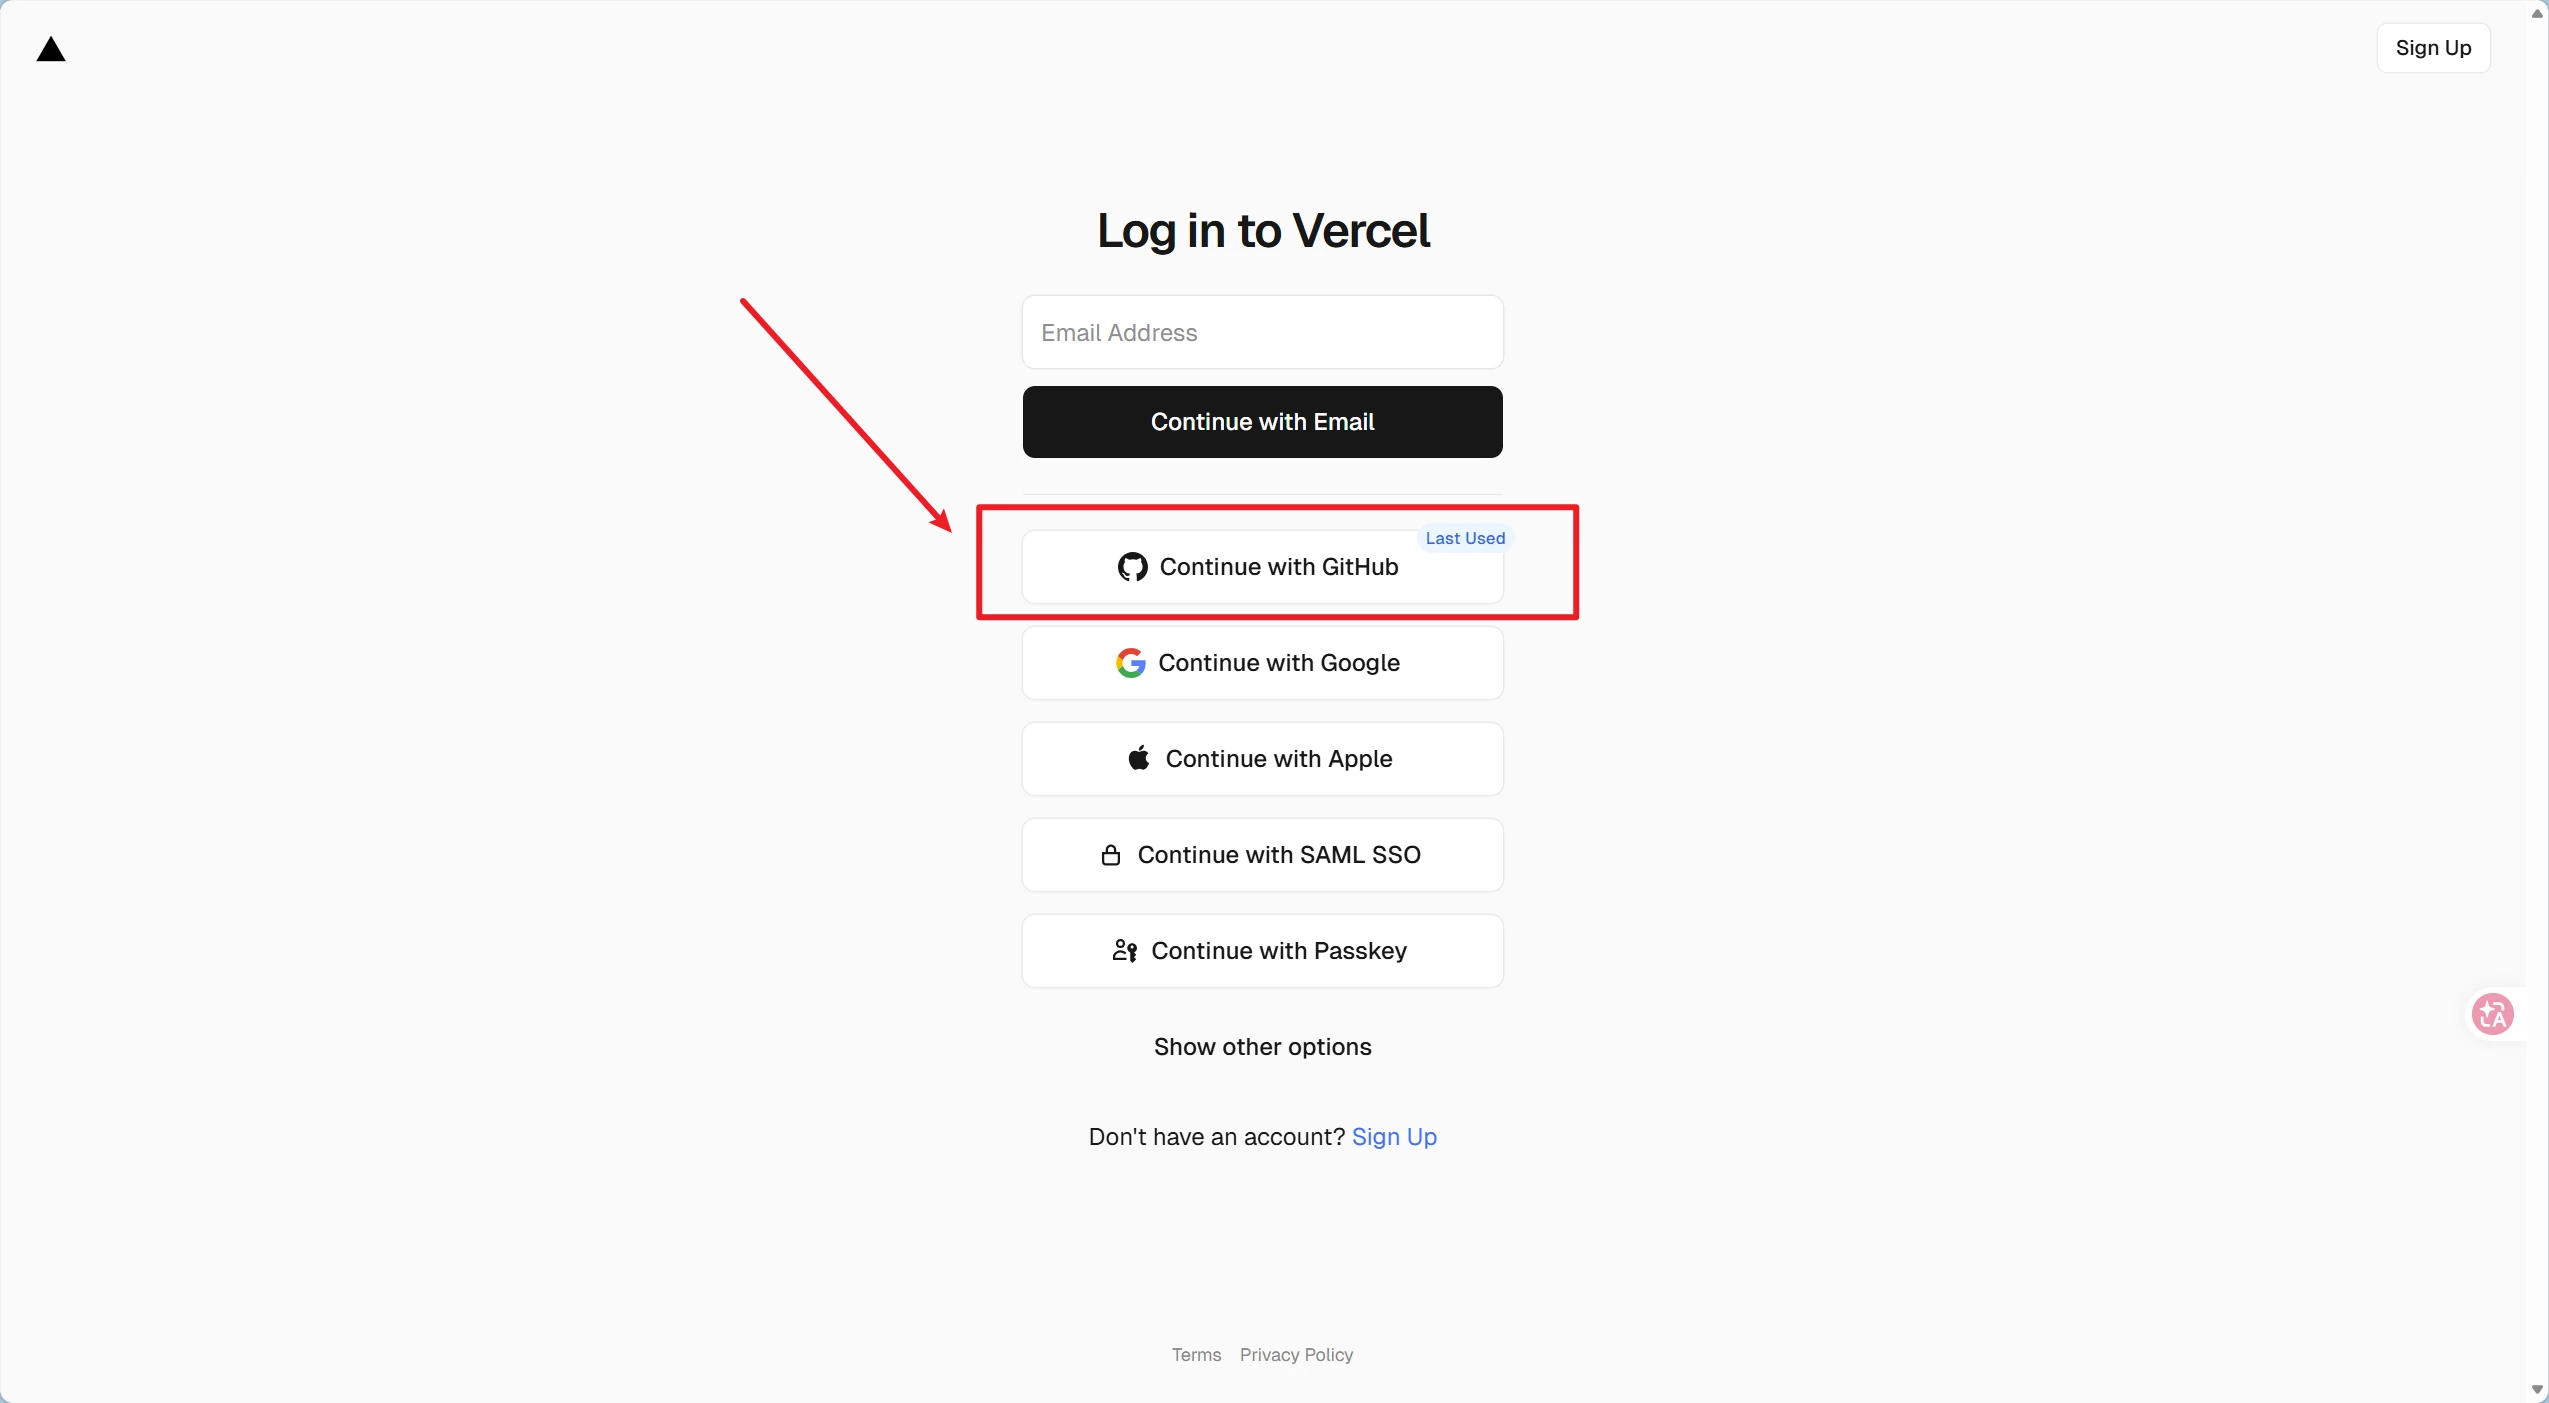
Note: When the authorization page pops up, we recommend selecting “All repositories”, otherwise Vercel may not be able to access your project.
Import the project and start deployment
① Click on the Vercel console “Add New…” → “Project”。
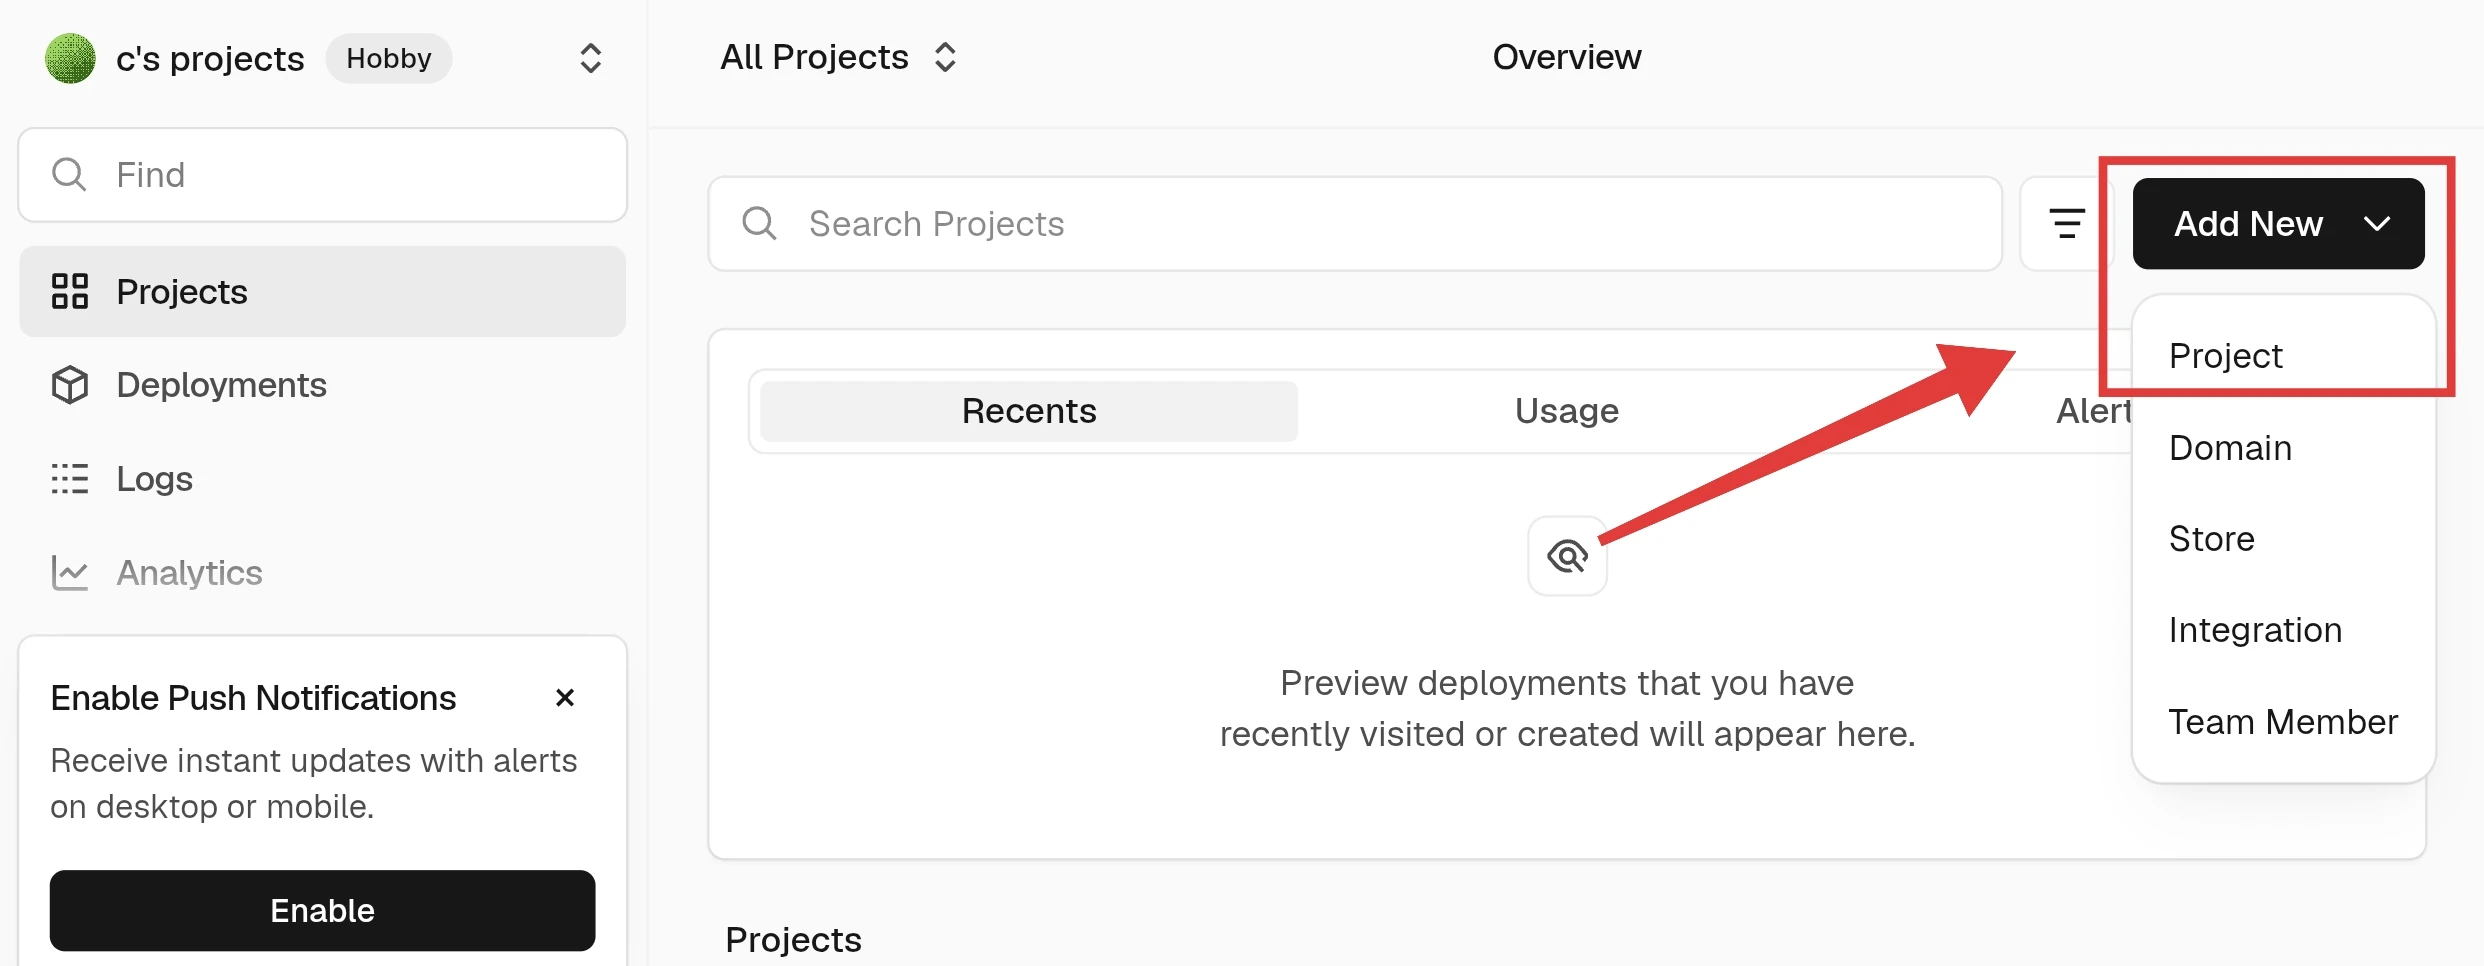
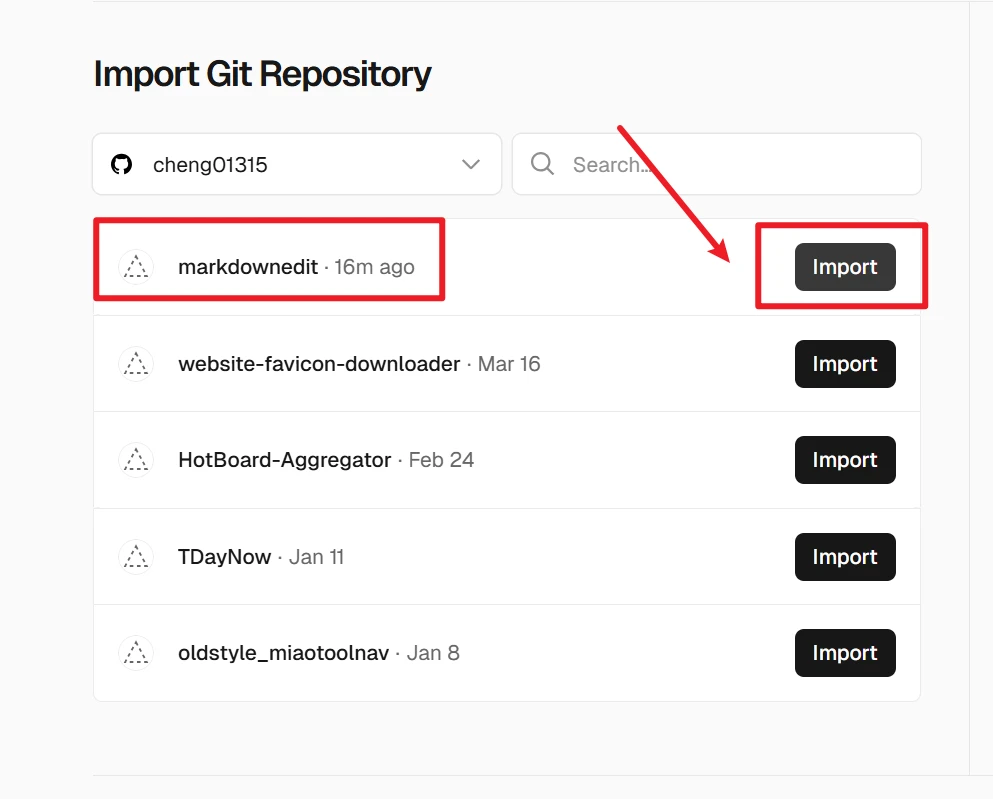
② Find the GitHub repository you uploaded earlier in the list, then click Import。
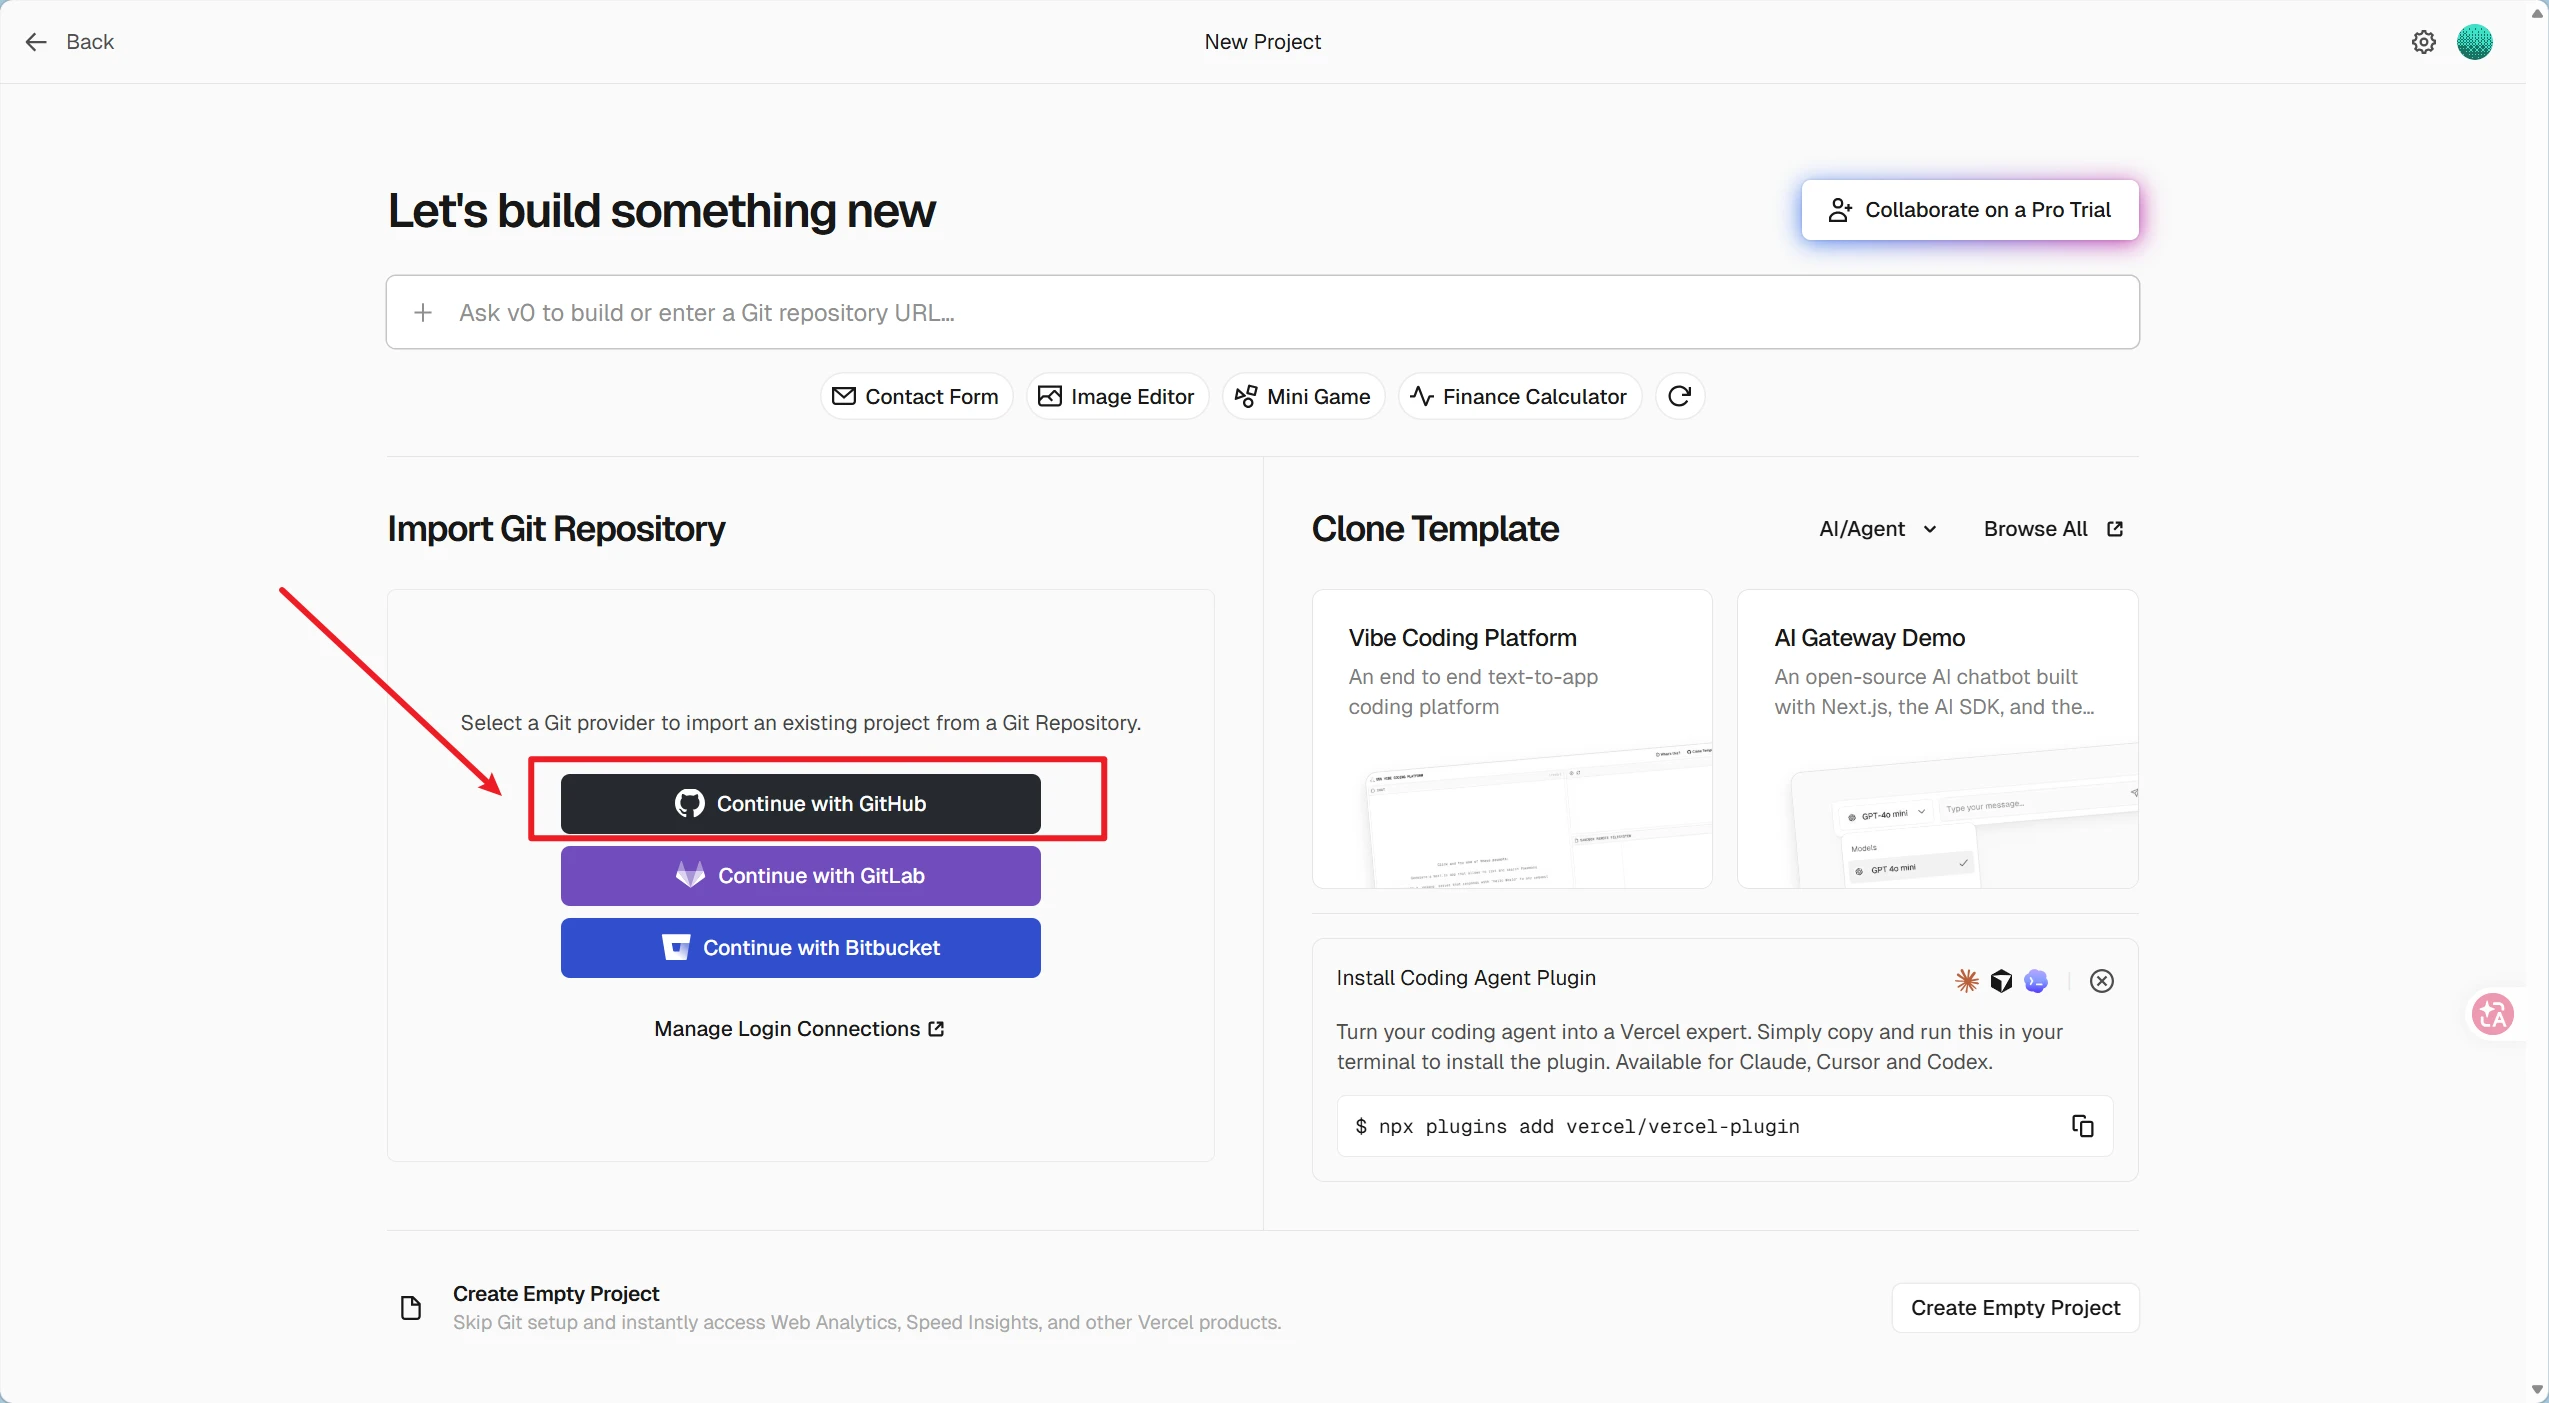
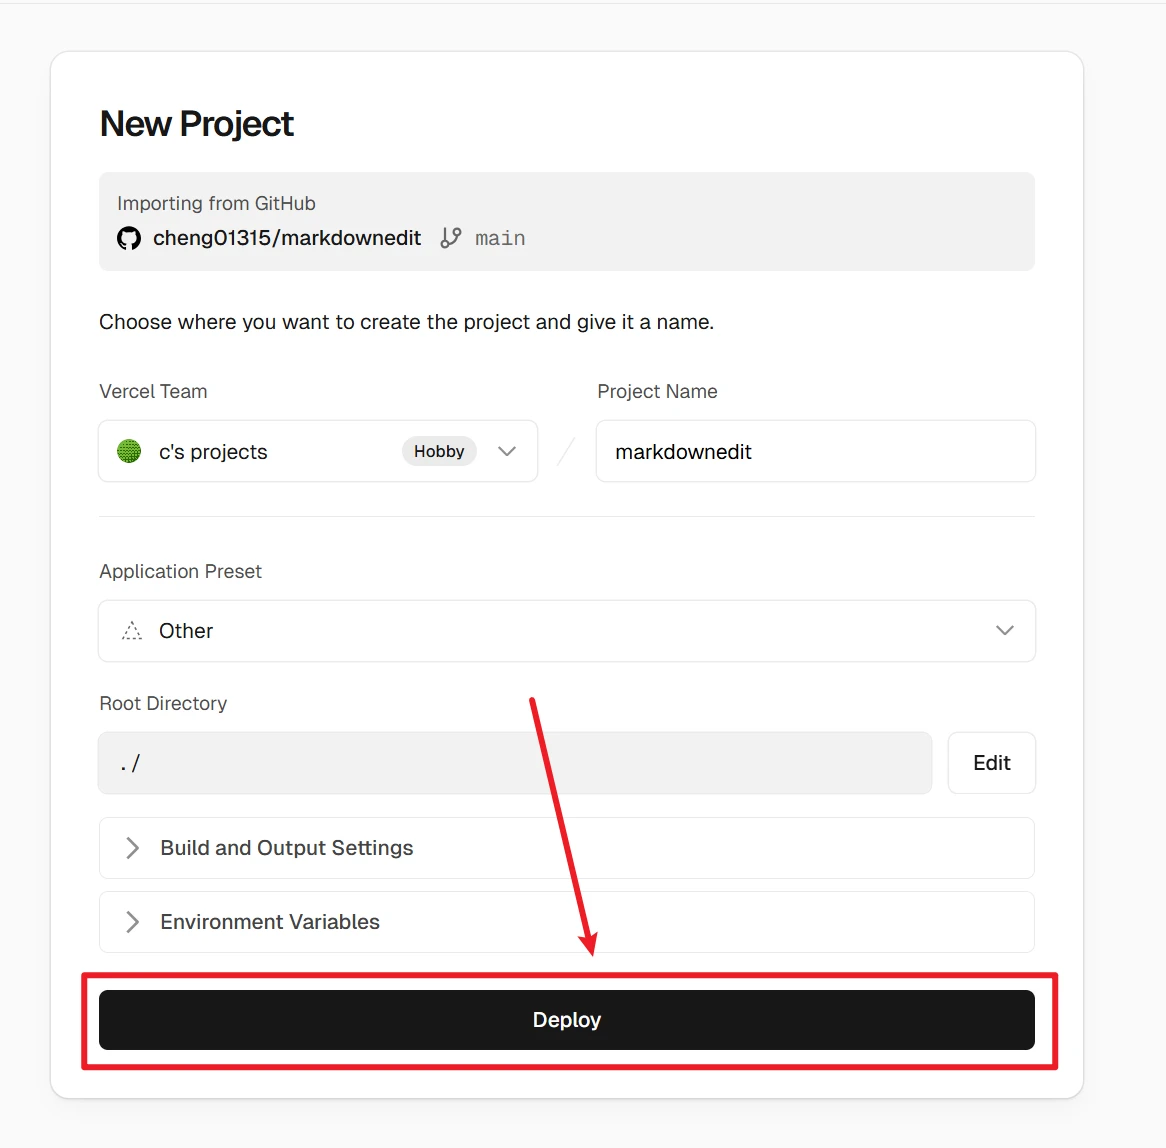
③ No need to change anything—just click it. Deploy! Vercel automatically detects the type of project based on its characteristics; for purely static websites, the default configuration is sufficient.
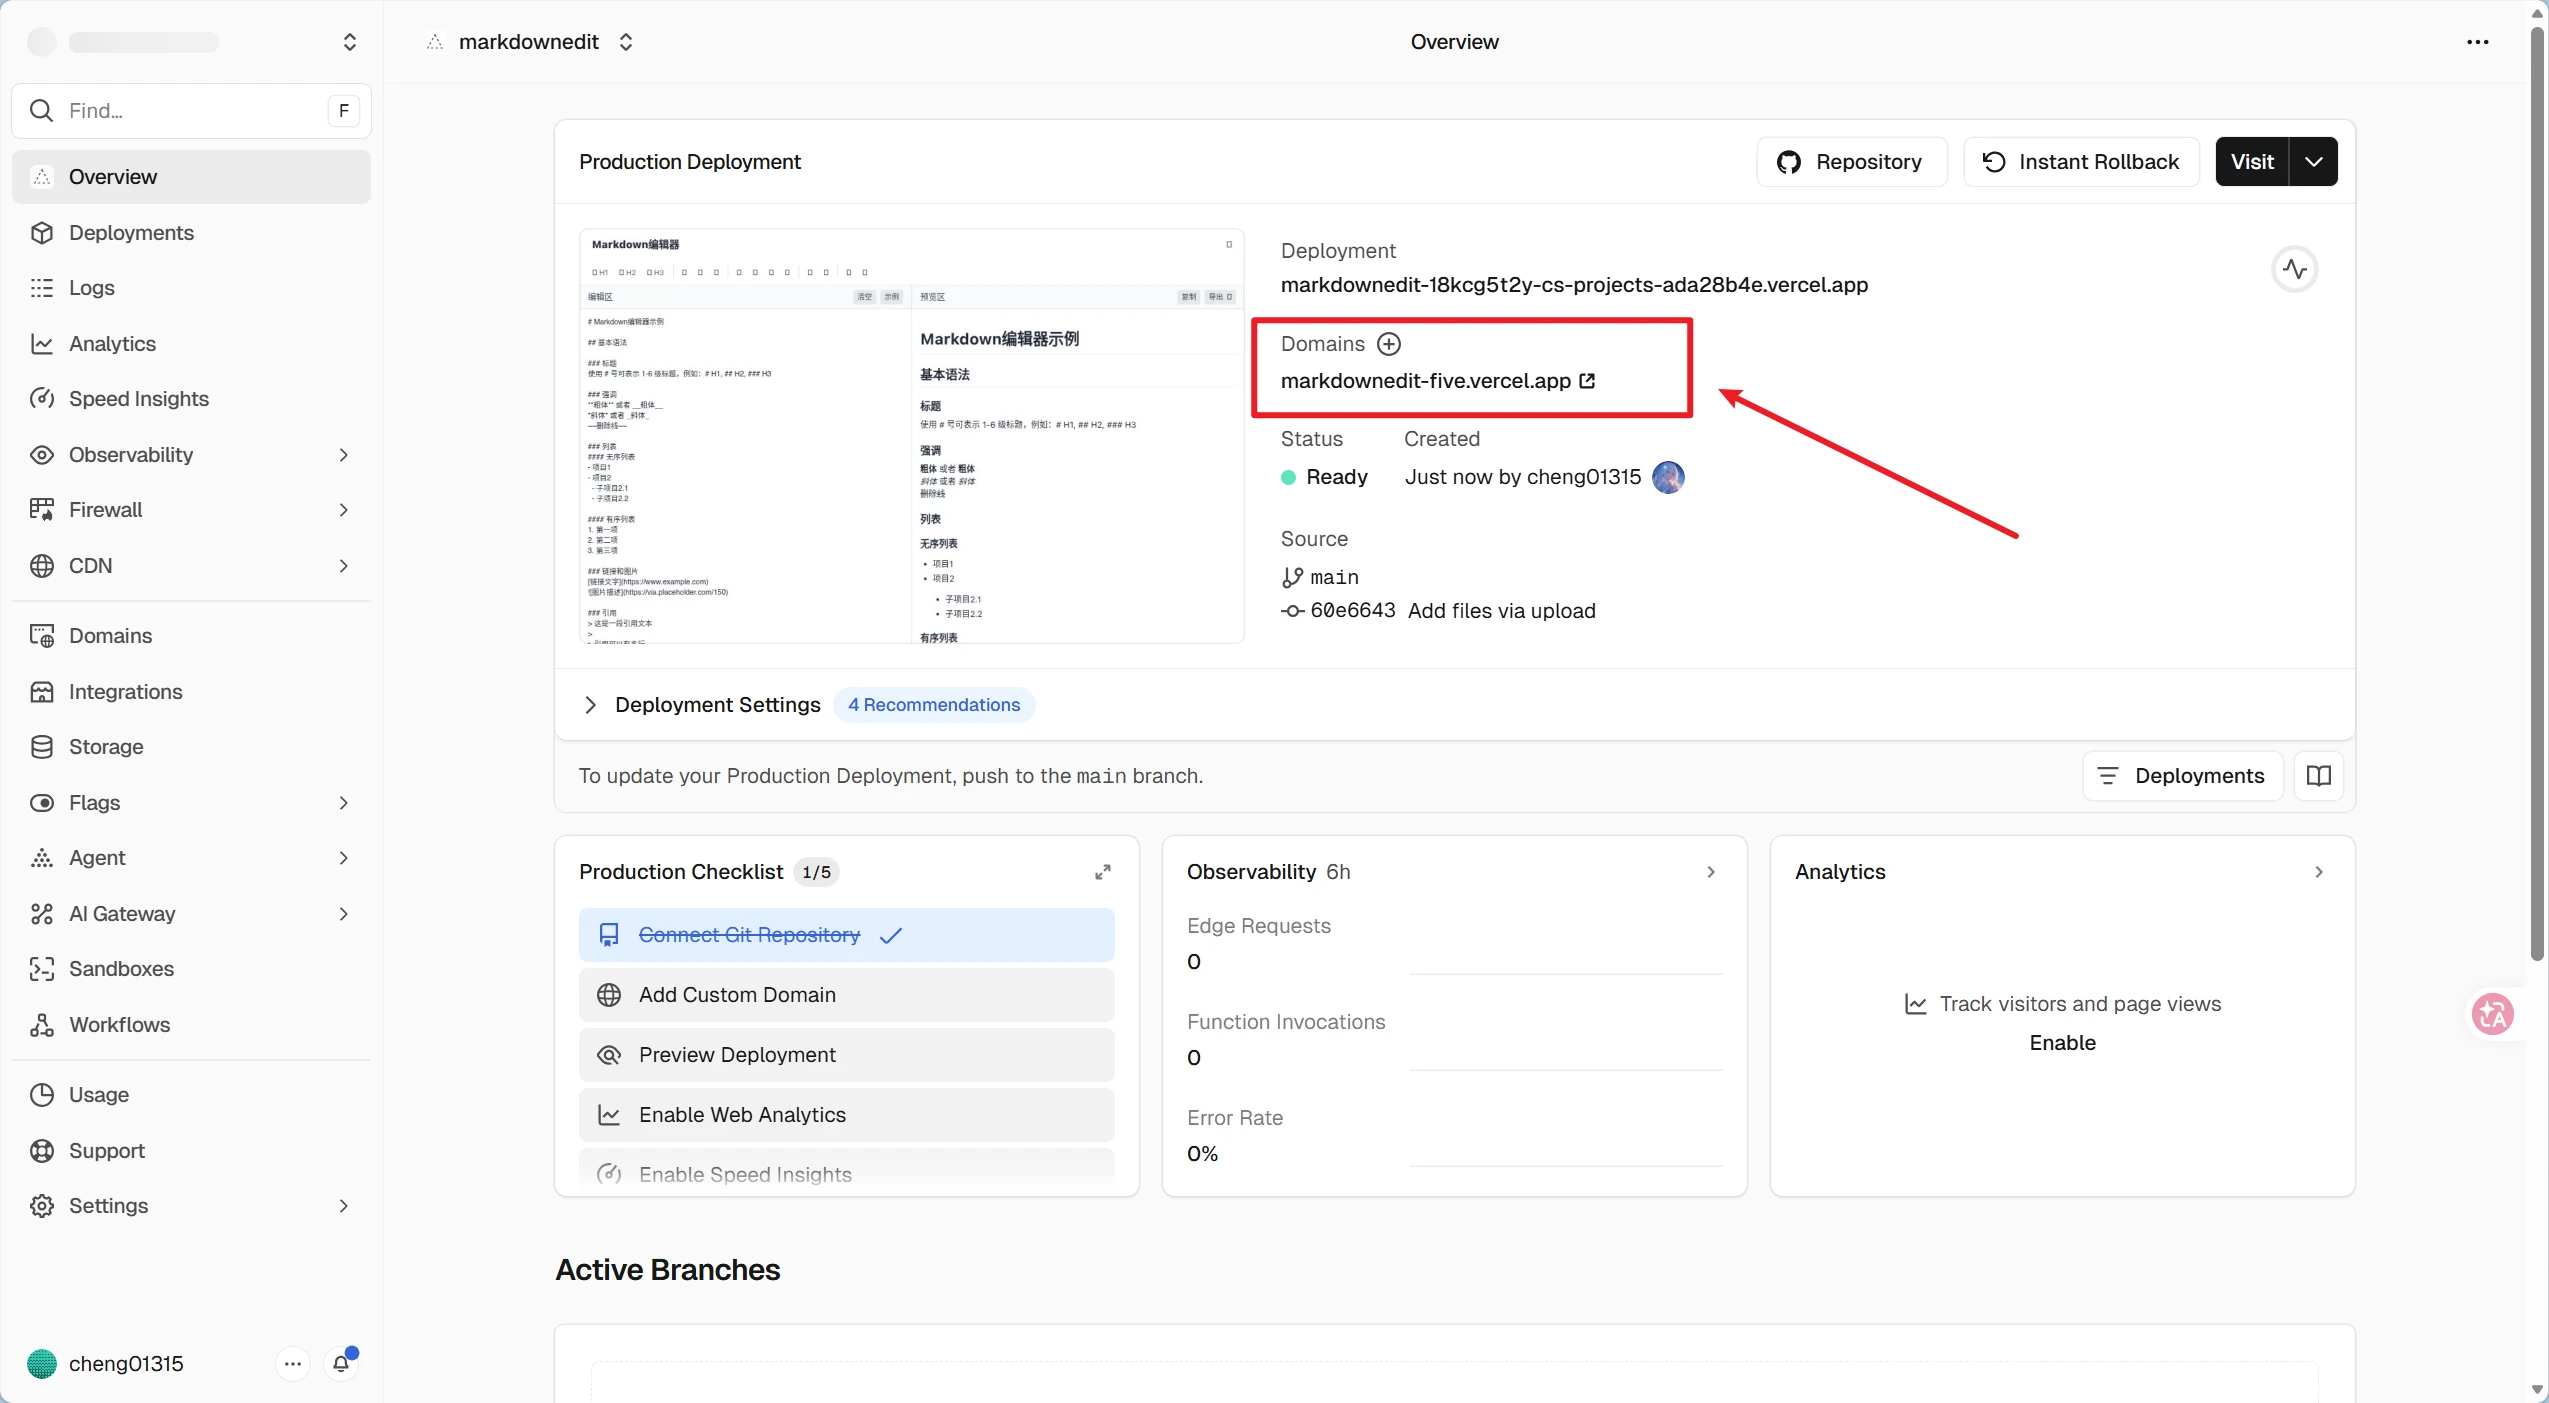
④ After deployment is complete, in Domains You'll see one right below .vercel.app Click the link at the end to see your finished product.
Tip to Avoid Pitfalls: If you get a 404 error when opening the page after deployment, please check
index.htmlMake sure it is located in the root directory of the repository, and be sure to strictly match the file name and case.
Step 3 (Optional): Link Your Own Domain
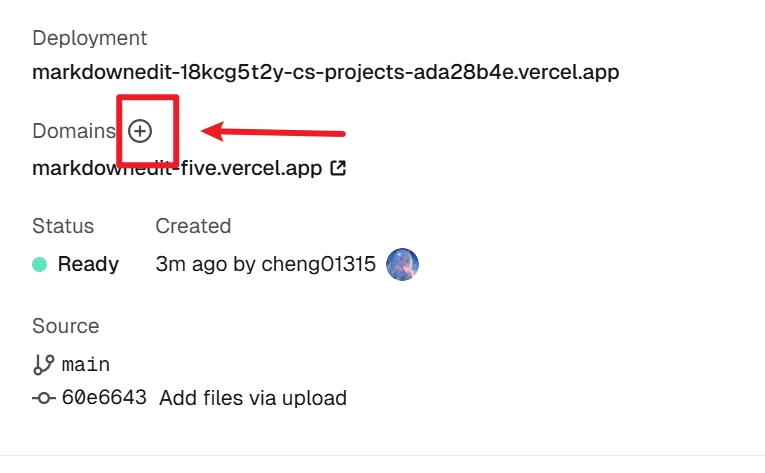
Feel that .vercel.app Not formal enough? Click Domains Click the plus sign next to it to add or purchase your own domain name.

Follow the instructions to add an entry in your domain registrar's control panel CNAME Record, generally refers to cname.vercel-dns.comVercel automatically configures HTTPS for you, so you don't have to worry about certificates.
Common Issues with Vercel Deployments
Why do I see a blank screen or a 404 error when I open the website after deployment?
Most likely index.html It's in the wrong location. Be sure to place it in the outermost root directory of your project, and make sure the filename is in lowercase. If you're using a framework, check that the build output directory is configured correctly.
Is it possible to deploy a dynamic website with backend logic?
Absolutely. Vercel supports serverless functions, and you can api Writing Node.js code in the directory to handle requests acts as a lightweight backend, making it ideal for scenarios such as submitting forms and integrating with databases.
I've modified the code. How do I update the live website?
This is the best part about Vercel. All you have to do is push your new code to your GitHub repository, and Vercel will automatically detect the changes and handle the deployment—no action required on your part. Every time git push This will trigger an automatic update each time.
Is the free allowance enough? Will I suddenly be charged?
It's more than enough for individuals and small projects. The free plan includes 100 GB of bandwidth and 100 GB of storage per month, with no automatic charges. If you exceed these limits, the service will be suspended rather than charged immediately, so you don't have to worry about unexpected bills.
How do I set up a blog or business website using Vercel?
We highly recommend using frameworks like Next.js, Hugo, or Hexo, as Vercel is natively optimized for them, making the deployment experience silky smooth. The template marketplace also offers a wide selection of open-source blog projects that can be cloned with a single click.
Can you drag and drop folders directly into Vercel, just like with Netlify?
Vercel focuses on automated Git deployment and doesn't have a drag-and-drop upload interface in the backend like Netlify does. However, you can still use Vercel CLI Upload from your local machine: Run the following command in the project's root directory npx vercel(Requires Node.js to be installed.) After logging in as prompted, you can deploy with a single click—no need to push to GitHub. For users who prefer a completely manual process, this is also a lightweight alternative.